 by Mike Brooks |
Last Updated: June 25, 2022
by Mike Brooks |
Last Updated: June 25, 2022 3D printing problems are common to both new and experienced users.
As an Amazon Associate, I earn from qualifying purchases. If you make a purchase after clicking on a link I may earn a small commission at no extra cost to you.
Your 3D printer may start printing in the corners instead of in the center, no matter what settings you put.
Quick Navigation
The printer may also produce inappropriate printing designs and warping or have a curling effect. These issues occur due to several causes, primarily when setting up the 3D printer.
3D Printer Not Printing in Center?
A 3D printer not printing in center is a waste of materials and time, which is an awful experience. You certainly need to put it under control.
This issue is majorly caused by the lack of appropriate software needed and the associated settings. Your settings might be incorrect as well.
You might have input a wrong print size or the actual origin of the printout layers to be at the corners.
You’ll need to update the software settings to have the origin at the center and have the appropriate print size.
Human errors can also lead to the 3D printer printing in the corner. You may prompt the computer to perform an incorrect command by mistake.
It’s crucial to be keen when setting up the 3D printer and the computer to start printing.
Why Are the First Few Layers Printed From the Front Left Corner of the Print Bed?
Your 3D printer may start printing from the corners because you don’t have the appropriate printer set within the slicer. This makes your printer’s bed size not match the bed size settings in the software.
Unmatching ender size between your bed and the Cura settings will have your 3D printer printing from the corner instead of from the center.
Another possible cause of this defect is using firmware with inappropriate offset values in your 3D printer.
Correct offset values determine the spots where the 3D printer will print. However, having different position offset values will result in incorrect printing within the build plate.
Luckily, there are simple solutions you can apply to fix these issues.
What You Should Do Before Attempting to Fix the 3D Printer
If your 3D printer starts to print from the corners, you should perform these practices before fixing the issue. These steps help to properly adjust the offset values and the nozzle position for precise printing.
1. Set Up the Slicer
The slicer in a 3D printer determines the point of origin when printing. Ensure you configure it to match the origin of the printer’s firmware; otherwise, the point of origin will not correspond with the firmware.
Having the point of origin unmatching will have the nozzle shift its position from the intended point of origin.
If you’re working with Ultimaker Cura slicer on cartesian printers, you should be extra careful with these settings as the slicer has the tendency of printing from the corner.
2. Adjust the Physical Origin of the Printer
Before you can set any 3D printer to start printing, always ensure you adjust the origin of the 3D printer to have it printed from the center. Adjust the 3D’s nozzle or head to point at home 0,0,15.
You can do this with the help of a terminal or a console. You can also make use of the G-code file. This file will move the nozzle of the set coordinate on your SD card such that it reads ( G1 X0 Y0 Z15 P500).
On completion of these adjustments, your firmware should be able to determine if the nozzle has shifted to the printer’s origin point, which should be the case at the moment.
If you’re using Marlin firmware, the nozzle or printer’s head will be detected on the front left corner of the build plate.
Still, if the firmware you’re using is either a delta cartesian, then the default position of origin is in the center.
3. Find the Offset Values and Positions
Offset values are essential in moving the 3D printer’s nozzle to the center of the build plate. You are supposed to offset the points of the center that matches the 3D printer you’re using.
To successfully set the offset values:
- Print a square-shaped object, probably large enough to fit at least 90% of the build plate.
- The printed paper should have the same parametric features as the design of the bed center calibration model.
To determine the offset values, you’ll have to:
- With the aid of the printed paper, determine the separation distance between the paper and bedplate edge.
- Focus on the X-axis. If the distance of separation of the paper and the edge of the build plate is 9mm from the right and 11 mm from the left, then the build plate is 1mm to the left. This implies that the offset bedplate is incorrectly set up into the firmware, as provided by the manufacturer.
How to Fix the 3D Printer Printing in the Corner
3D printers not printing in the center have several solutions that can solve the problem. Some of the solutions are simple fixes, while others are complex.
In fixing these issues, you first need to determine the source of the problem within your 3D printer. Suppose the problem is the slicer has incorrect bed dimensions.
In that case, you can establish a 3D printer profile that you can manually input when printing or find the correct bed dimensions set on your slicer.
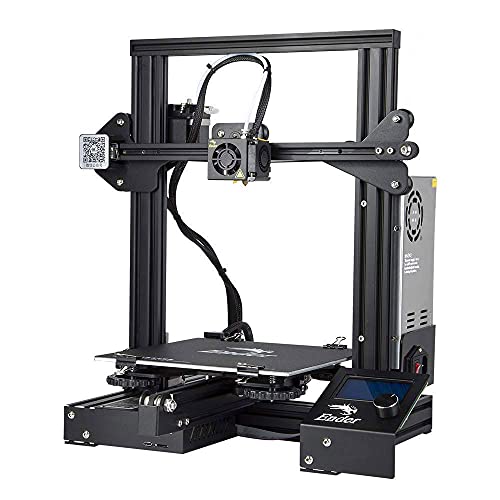
If your 3D printers have matching dimensions with Ender 5 (check at Amazon), you can use either of the profiles provided they have the exact measurements.
The problem can also be Cura’s origin. Your 3D printer can either have its origin at the center or the front left corner of the build plate. Adjust the nozzle to match the printer’s point of origin.
To calibrate your 3D printer to have a new center point, you’ll have to:
- Establish the correct point of origin of the printer
- Adjust the offset values and apply the settings to the slicer
- Set up the firmware to adjust the start point.
Here are the guidelines to follow when fixing the issue:
-
Move the Nozzle/Print Head to the Center
Having your print head at the center ensures the first few layers are in the center when printing. You should do so in the least distance increment when moving the nozzle, probably a 1 mm increment for precision.
You can use pronterface software to shift the nozzle to the center. However, before you start using this software, ensure you turn off the Arduino software.
After moving the nozzle to the center, click the auto-home button to return to the default home position settings.
-
Determine New Offset Values
Use the offset values to configure your Marlin Firmware.
To find the offset values, determine the midpoint splitting the print bed X and Y measurements into halves.
The values you get when you subtract the values of the print head position to the new center from the midpoints values give you the new offset values. Don’t panic if you find negative values; they can happen depending on the initial position of the print head.
-
Put the Offset Values on the Configuration File in the Marlin Firmware
Find the manual x and y-axis home positions, usually symbolized as (//) lines. Fix the offset values between the two slashes and comment them back in the files.
-
Upload the Marlin Firmware to the 3D Printer
After configuring the offset values, the next step is to upload the Marlin firmware to the 3D printer to fix the issue.
-
Check to Confirm if the Fix Worked
You can confirm if the solution worked by putting the print head to the midpoint position, let’s say (90,90). You should then connect your printer to pronterface software and command your 3D printer to auto-home settings.
Feed the 3D printer with this command, G0 X90 Y90 Z2
The Z-axis value clears the print head and allows it to have some space off the heated bed. The nozzle should go to the center of the print bed if the fix were successful.
-
Retest the Printer
You can finally test the 3D printer by printing the calibration file again.
How to Update Marlin Firmware
To update your Marlin firmware, you’ll need
- Preinstalled Arduino IDE technology windows computer
- One connecting cable
- Female to Female Dupont cables- five
- Dupont wires- One female and one male
This is how you’ll go about it:
- Go to Arduino IDE interface and click on ‘examples sketches.’
- Open Arduino ISP
- Go to manage libraries and choose U8glib library
- Select board manager after which you should input sanguine board
- Connect the Arduino Uno.
- Upload the sketch and save
- Go to the home menu, then select the Sanguino board.
- On the Tools tab, open burn bootloader
- Unplug the Dupont from the 3D printer.
- Unplug the Arduino Uno from the printer.
How to Fix Printing Issues on Ender 3
If your Ender 3 printer (check at Amazon) starts printing at the corner, you can fix the issues by applying a direct offset change.
Make use of the x and y nozzle offsets on the Cura firmware.
In the firmware, go to the preferences and select configure Cura. You are then supposed to choose printers then machine settings, after which you finalize by choosing extruder one tab.
If the offset values are positive, then the print head will move to the back right side of the printer. However, if the values are negative, the print head will offset the printer’s left front corner.
Conclusion
Now you know what it takes to fix a 3D printer that does not print from the center. This is a very crucial setup practice everyone handling 3D printers should know.
Be sure to identify the root cause of the problem before making the necessary changes to the 3D printer. This is a crucial practice if you want to get quality prints.

Recommended Reading
What Is TPU Filament? The Basics & Useful Guide.
What is TPU filament? It originates from a class of polyurethane plastics with important features such as high elasticity, transparency, and resistance to...
Is It Legal to 3D Print Legos?
is it legal to 3D print legos? 3D printing lego is illegal. Nonetheless, there are some conditions. However, the interlocking toy bricks are not copyrighted...
Optimal ABS Filament Temperature for Your 3D Prints
What is the optimal ABS filament temperature? ABS has a relatively low melting point so that it can be printed at lower temperatures than other materials.