 by Mike Brooks |
Last Updated: June 24, 2022
by Mike Brooks |
Last Updated: June 24, 2022 If you’ve ever had a 3D print file from filament runout, you understand how frustrating it can be. 3D printing uses thermoplastic filaments that melt when heated rather than burn.
As an Amazon Associate, I earn from qualifying purchases. If you make a purchase after clicking on a link I may earn a small commission at no extra cost to you.
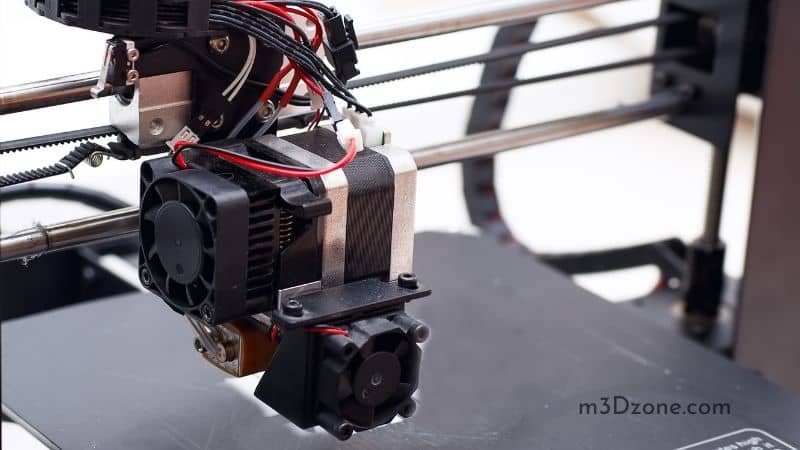
The printer’s collection point contains a heating chamber that feeds on the filament, heated to its melting point, and then squeezed out through a metal nozzle.
Quick Navigation
- Why Do You Need a Filament Sensor?
- Sensor Upgrade Options
- How Do You Test a Filament Runout Sensor?
- Does Ender 3 Have a Filament Sensor?
- How Can I Add a Smart Filament Runout Sensor to Ender 3?
- Does Octoprint Work With Filament Sensor?
- How Do You Make a Filament Runout Sensor? [DIY]
- Sensor Upgrade Options
- Conclusion
The problem is a lot of printers do not recognize when filament runs out, and they automatically adjust using a geared mechanism that fails to report back to the printer.
Its configuration is to feed, melt and extrude. This is where the filament runout sensor comes into play.
The sensors immediately message the printer’s internal processor when there is an unfilled spool.
Why Do You Need a Filament Sensor?
A filament sensor detects when a spool is empty or no filament run is feeding and reports back to the printer’s internal processor.
After the new spool is loaded, the filament links to the extruder, and the printing procedure can proceed from where it left off, which ensures that you save time and print resources.
In case of a filament runout, the sensor signals the printer to automatically halt the print, offload the remaining few centimeters of the material from the heat break, and transfer the X-carriage away from the printed part.
That limits long prints, which leads to exhaustion and reduces print failure.
Filament runout sensors also signal the user to replace the spool and connect a new filament. Once this smart function activates, it ensures that you save time by reducing printing accidents using an auto warning mechanism.
Smart filament sensors such as the BTT sensor (check at Amazon) detect false positives such as load failure to pass through the module. Besides, it can detect nozzle plugs, consumables entanglements, and abnormal extrusion machine failure.
Sensor Upgrade Options
There are various options to choose from when upgrading your sensors, including optical, mechanical, and electronic installation.
Optical Solution
You can use an optical limit switch to detect and mitigate the underlying issue of missing print material. The switch’s functionality is based on light deviation, focusing on the receiver end of the sensor.
If the switch’s primary function is to detect different materials, we recommend the installation of a clamping spring.
The optical solution means that you should design housing for the same. Find a DIY sample here.
The Perimeter Switch should be located in the tray between the spool and the 3D printer. A PTFE tube goes a long way to guide the filament through the printer frame with slight friction. The mechanical setup should be complete after this level.
Mechanical Solution
The mechanical solution depends on the resistance of printing material passing through the switch to function. The absence of the resistor triggers the switch, which in turn activates the buzzer.
The mechanical solution comes at a fair price and is quite reliable. However, you’ll require a casing and a PTFE tube (check at Amazon) to ensure maximum performance.
Silencer
The Ender 3 does, however, have one downside, sound emission! The 3D printer beeps every time you engage the LCD screen.
Creality’s engineering team came up with a silent, user-friendly motherboard on sale with pre-installed software to lessen this problem.

If the motherboard is not your primary concern, you can opt for a silencer attached to the signal transmitter on the LCD to remedy the beep sounds.
SD Card Holder
The bottom end location of the micro SD card port of the Ender 3 is unsuitable for users with unstable motor aid. In such cases of self-printing, we advocate the use of a cardholder with an adapter cable running from the micro SD.
How Do You Test a Filament Runout Sensor?
The IR sensor is a hybrid solution that merges an IR laser sensor activated by a tiny mechanical lever. You can view the sensor’s status in the machines menu under Info -> Sensor info:
- 1 – Filament loaded
- 0 – Filament unloaded
- N/A – Sensor is not activated or installed incorrectly.
After installation and activation, should the sensor status remain N/A, check the cable connections and the mainboard.
The board has a cable connector containing a safety latch that you should lock when connecting to the mainboard. The black wire should be towards the Z-tower (front) and the red wire towards the printer’s PSU connector (back).
The sensor side of the cable latch should face the same direction as the components on the chip. Check the color sequence and direction and ensure you are running on the current version of the firmware.
Firmware links the hardware and software. Firmware plays a very crucial role in connecting hardware and software.
The firmware provides a base where connection, translation, and transmission of input information from software to computer.
In 3D printing, this procedure occurs by sending a G-code file from the software to the printer directing the firmware to decipher and give an output to the rest of the components.
Firmware understands the G-code command “G2 X20 Y40” and sets the output to the stepper motor. The motor directs the extruder to reach “X=20 and Y=40”.
The firmware ensures that this process is seamless. Otherwise, the 3D printer wouldn’t understand the G-code input. Again, the firmware is commonly tailor-made for specific mainframe components such as Marlin.
Does Ender 3 Have a Filament Sensor?
Creality’sEnder 3 stands out due to its low price and its simple build. However, it lacks a filament runout sensor. The multiple versions have minimal modifications, but simple upgrades can give the best possible result.
A filament runout sensor setup is one crucial upgrade that you can carry out. The similarity of the extruders and the Z-axis in the Ender three variations ensures many sensors and mounts are well suited to the printers.
How Can I Add a Smart Filament Runout Sensor to Ender 3?
There are only two options for filament runout installation on the Ender 3. The installation can be optical or mechanical, although the installation methods are almost identical for both limit switches.
Optical Switch
If you opt for an optical switch, your filament runout sensor will require multiple parts to print transparent filament. Multi-part sensors use PTFE due to their assembly being more intricate.
By contrast, single part models do not detect transparent filament and are a good choice if you are not planning on using transparent filament. Alternatively, you can buy a mounted sensor well suited for the Ender 3.
Mechanical Switch
The mechanical switch comes with two installation criteria: the switch housing and the sensor housing.
The dual functionality of the switch housing is admirable because besides playing the role of a sensor, it also acts as a filament guide. This housing is preferable in applications of large limit switches.
Link your sensor’s cable to the mainboard after completing your housing. The go-to board is pin 27, which enables flawless workflow by lessening soldering and cutting wires. If you already have pin 27, Raspberry Pi (check at Amazon) provides more efficiency.
Smart filament sensors such as the BIGTREETECH (BTT Smart filament sensors) can detect minor module failures and spot failures arising from abnormal extrusion, nozzle plugs, and consumable muddle.

Does Octoprint Work With Filament Sensor?
Octoprint started as software specifically made to control printers wirelessly. Over the years, it has become a dominant force in the printing industry by offering a wide range of solutions.
Octoprint’s plugins allow you to custom add a filament runout sensor to your printer. The plugins integrate smart filament sensors to Raspberry pi GPIO pins (check at Amazon).
How Do You Make a Filament Runout Sensor? [DIY]
To ensure proper functionality of a buzzer/beeper, correctly attach well-insulated copper cables to the switch end and the battery source.
All these attachments should be done by soldering, and having the latest firmware, such as the marlin firmware, makes it possible to halt or pause your printer if it’s well-mounted to the appropriate pins on your controller board.
Requirements
- An end-stop switch
- A Sensor. There is a diverse pool of sensors to choose from. Unlike the optical sensor, the end-stop sensor has proven cheaper and relatively easier to set up, which is much harder to design and set up.
- Casing. A casing for the switch can be 3d printed to act as housing.
- The Rest. A buzzer, shrink tubes, insulated cables, hot air blower, power source, 3D printer to reproduce the housing, filament, screws, and a soldering wire.
The filament must go over the roller and expose the connection to activate the filament runout sensor. The filament rollover frees the mechanical switch to close the connection, which leads to the buzzer creating an alarm.
Sensor Upgrade Options
Some of Ender 3’s positive attributes are its low prices and simple hardware. The manufacturer has provided software and hardware, allowing for easy replacement of 3D printers that automate continuous printing (pptical or mechanical).
Conclusion
Ideally, if you contemplate buying a printer, ensure you get one with a filament runout sensor. Alternatively, if your printer doesn’t come with a preinstalled one, you can upgrade to a smart filament sensor which costs only a few bucks.
In case you conduct small prints, you can predict the lifeline of the filament, and you don’t necessarily need a filament sensor. On the other hand, large prints might require a sensor due to their long printing hours.

Recommended Reading
9 Best 3D Printing Software for Beginners [Useful Guide]
A 3D printer needs a good 3D printer software. Here's our 9 picks of the best 3D printing software for beginners to help point you in the right direction.
3D Printer Jerk Acceleration
What exactly is 3D printer jerk acceleration? The setting is only for the printer to accelerate or decelerate the motion of the extruder head based on ...
Stepper Motor Cooling. 4 Easy Ways to Do It!
Stepper motor cooling guide. When it comes to cooling your stepper motors, you have two main options: active cooling and passive cooling. Let's see more!