 by Mike Brooks |
Last Updated: June 22, 2022
by Mike Brooks |
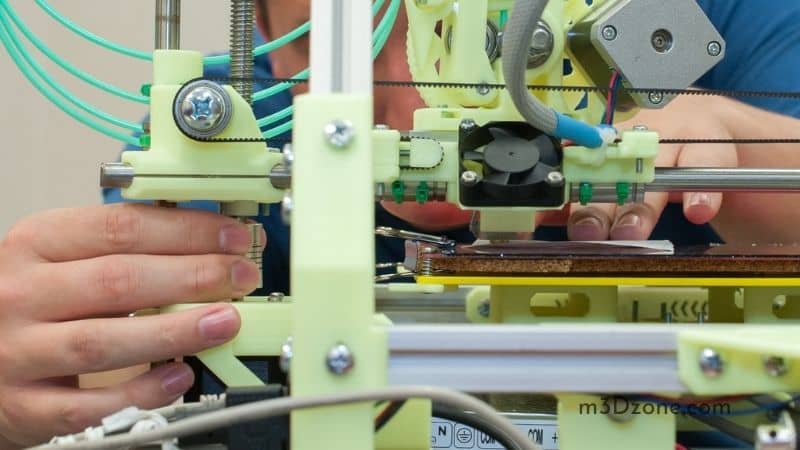
Last Updated: June 22, 2022 When dealing with a 3D printer, it’s essential to understand its anatomy, understanding all the parts and how they work.
As an Amazon Associate, I earn from qualifying purchases. If you make a purchase after clicking on a link I may earn a small commission at no extra cost to you.
You also need to know how to calibrate and level the bed for a successful and quality 3D printout.
Quick Navigation
When 3D printing, you should ensure the distance of the first layer from the bed is ideal. For this, you’ll need to ensure the 3D printer bed is leveled.
You should be careful when handling the 3D printer, especially its bed. Improper handling can cause the bed to warp. You should note that any 3-point plane has a flat surface in between.
When leveling the bed of your 3D printer, you should adjust the knobs turn by turn until you find a perfectly level bed.
The first layer of the 3D printout may be deceiving. You, therefore, need to check how it attaches itself to the back of the bed.
Bed leveling your 3D printer is an effective practice in ensuring your printouts’ quality is high. However, leveling the bed can be a little challenging.
Don’t panic, though; we have the tips to get you going with your 3D bed level alignment.
Level 3D Printer Bed. What Is It?
Leveling a 3D printer bed is simply aligning the 3D printer bed to achieve a uniform distance from the nozzle to the whole surface of the bed. 3D bed leveling has nothing to do with the floor level or alignment.
A level 3D printer bed allows a bubble placed on it to look skewed. On starting 3D printing, the drop will have the first layer as a perfect flat print part.
Leveling the 3D printer bed ensures a level bed with a uniform distance from the nozzle to the whole surface of the print surface.
You shouldn’t focus on the distance between the nozzle and the floor or the workbench, as they don’t determine the flatness or level extent of the bed.
Why Do I Need a Level Bed?
Many procedures in a 3D printer are done by FDM filled with filament. Its properties at a specific temperature make it possible to control its form. A leveling bed is capable of extending evenly up the whole build surface.
It is essential to know everything you need to have a level bed. You’re supposed to know when and how to adjust the height of Z.
Understanding these requirements helps you 3D print correctly. You should also be able to identify potential problems that may arise while adjusting the Z height.
Methods of Leveling a 3D Printer Bed to Achieve a Level Bed
There are three ways in which you can level the bed of your 3D printer. All the methods effectively achieve a level 3D printer bed; the choice of a particular method depends on your preference and the level of understanding of the methods.
If you want to align your 3D printer bed, you can consider using:
- Manual 3D printer bed leveling
- Software 3D printer bed leveling
- Firmware 3D printer bed leveling
Manual 3D Printer Bed Leveling
Manual 3D printer bed leveling is the practical use of hands to adjust the bed of your 3D printer to achieve a perfect level. It is the easiest and simplest way of leveling your 3D printer bed.
Manually leveling the printer bed comes with its affordability gains. You don’t require any hardware applications or complex and complicated calculations to align the bed.
A 3D printer with a bed that supports manual bed leveling has a build plate embedded over the bed carriage. The build plate is not fixed to the bed carriage, but it is attached to the bed carriage with leveling screws, thumbscrews, and springs.
The bed can still be in place when leveling and can still carry the weight of the print parts when 3D printing.
How to Level the Entire Bed of Your 3D Printer Manually
When leveling a 3D printer bed manually, you will most of the time use four screws to carry on with the process, each placed at a corner all around.
Here is how you should do it:
- Firmly fix the screws to all corners to create sufficient working space when detaching them later. You should drive the screws halfway to ensure you have enough working space. Avoid pushing the screws all the way.
- Move the Zo (home) axis. The Zo axis may be too far from the printer bed, even after loosening all the screws. You’ll need to adjust the Z-minimum endpoint to a lower level to calibrate.
- With the help of the LCD menu guidelines, jog the printhead on the screws that gives the bed a level surface. You should then insert a material like paper in between the bed and the nozzle.
- After this, drive the screws backward to loosen them until you feel resistance when pulling the paper. Note that the paper should not be firmly held between the bed and the nozzle; you only need a little pressure to hold it in between.
- Repeat this procedure to all the remaining screws to ensure that each screw acts on the piece of paper with the same force intensity.
- After finishing the process to all the screws, be sure to check out by hovering over the screws with the nozzle and ensure the screws do not shift; they should be intact in their primary positions.
- You’re good to go. After finishing this process, you can start printing. Make necessary adjustments while printing to ensure a perfect first layer.
After leveling your 3D bed printer, it is safe to work on. However, you need to regularly inspect and make necessary adjustments to the bed for a quality printing experience.
Firmware 3D Printer Bed Leveling
The second method you can use to level the bed of your 3D printer is firmware leveling. It is used in 3D printers supporting minimal user intervention.
These printers have automatic systems that enable the printer to level automatically and restrict manual user interventions.
Firmware bed leveling levels the bed by using a small probe to detect the bed and the distance between the bed and the Z-axis, either minimum or maximum.
The firmware does auto bed leveling. It also creates grids that give the uneven bed a smooth surface.
How to Level the Bed of Your 3D Printer With a Firmware Level
3D printers that support firmware leveling have a default that automatically enables the firmware to align and level the bed. You don’t need to turn it on or off every time you want to use it.
Their 3D printers usually have a wizard with instructions on setting up and running the firmware on your 3D printer.
Follow the guidelines provided in the manual if you want to level the bed.
To level the bed of your 3D using firmware leveling, the firmware will:
- Heat the bed and nozzle to expand to have an accurate reading.
- The print head of the 3D printer will hover around over other parts to stimulate the formation of the mesh of the detected surface.
- The 3D printer will then print multiple lines to establish the Z-Offset that works best. You may also need to initiate a test print manually.
- It will then adjust the Z offset through the LCD menu. It will change the position of the nozzle tip by moving it either closer or further from the bed. This is essential to achieve a uniform first layer and helps determine the distance of separation of the tips of the probe and the nozzle.
What else can you say about Firmware leveling? This program has simplified the bed leveling process of the 3D printer, which has always been challenging, especially to first-time users.
You should most important note that there are several types of probes on 3D printers with different limitations to their application.
Software 3D Printer Bed Leveling
Software 3D printer bed leveling uses developed software to align and level the bed of the 3D printers.
It uses a slicing software called MatterControl with an installed wizard that guides the printer to level even the obsolete-shaped bed to have a uniformly flat surface and a perfect first layer.
The slicing software (MatterControl) can adjust the Z values found in the sliced Gcode to make the nozzle constantly move up and down in an attempt to get a consistent relative distance from the bed.
Software 3D printer bed leveling eliminates the effect of 3D printer beds bowing and warping due to profound temperature changes from the rapid heating and cooling effect.
It is also able to level 3D printers with bowl-shaped beds, unlike manual and firmware leveling.
How to Level the Bed of Your 3D Printer With Software Leveling
To level the bed of your 3D printer by software leveling, connect the 3D printer to MatterControl directly. You will have to have a USB connection from your printer to the PC.
Here is how you should conduct the process:
- Connect the 3D printer with the MatterControl.
- Go down and select the “Controls” tab. under it, select the “Calibration” subsection and click “Printer Calibration.”
- Follow the guidelines provided by the wizard.
- The 3D printer will home on X, Y, and Z. Move it over the first point to be calibrated.
- Put a material like a piece of paper between the nozzle and the bed. Move the nozzle slightly to reduce the distance between it and the bed, then try to pull the paper. You should feel a slight resistance to the pull. The resistance should not necessarily be strong enough to hold the paper but sufficient to hold it in place.
- Repeat the same procedure for every grid until a mesh is formed. This ensures an even resistance on the paper at every point.
- Do a test print to confirm that the bed is leveled correctly. If a large rectangle is produced, some points are too far or too far at the formation point. Fine-tune the Z-Offset by moving it closer or further to the bed.
When you finish leveling the bed, you can continue 3D printing from MatterControl or export the sliced Gcode onto an external device.
After finishing the leveling process, the first layers will be printed with a uniform relative distance to the bed.
If you still see irregular spots on your first layer after leveling, run the printer through the wizard again. If you see the uneven spots on the probe surfaces, fine-tune the mesh grid’s number of points.
How Often Should I Level My 3D Printer Bed?
You should always ensure you have a level bed before you can 3D print. But the question is, ‘How often?’
Leveling the bed of your 3D printer should be a routine maintenance practice you carry on on your 3D printer. After having about 5 to 10 prints on the 3D printer, you’re supposed to inspect the printer to make necessary adjustments after leveling.
You should always do a leveling exercise every time you adjust the temperature of the 3D printer or if you move the hot end.
Types of Probes Used in Firmware Leveling (Print Head, Bed Leveling)
1. Capacitive Probe
Capacitive probes are used on the Ultimaker 3. You set off by manually leveling the bed using screws. The printer will then measure the three points and determine the most appropriate position to compensate.
With a capacitive probe, the printer will skew the first layers to form a perfectly flat layer. It has a chip that measures the capacitance between the print head and the build surface. Working with this system is easy; besides, it’s rare for it to break down.
2. Lulzbot Style Probe
This probe has a wire connecting the board and the heater block; other wires connect the board to the four washers in the bed. When starting to print, the Lulzbot wipes the nozzle and probes one corner.
It moves through all washers, probing each of them. This system does not need calibration hence can quickly fail to level the bed.
If it fails, you’ll have to clean it manually to get it on track again.
3. Inductive Probe
Inductive probes operate by sensing conductive metal. They are efficient in triggering an ability at the same point, although you’ll be forced to use Z-offset values when printing.
One problem with this system is that your final prints won’t stick. You’re supposed to input the Z offset values initially, and from there, the printer will be operating on its own.
Other Types of Probes
- Force Sensitive Resistors
- Accelerometer
- Touch Probe
- IR Sensor
- Microswitch
Final Thought
Working with 3D printers is an excellent experience altogether. Understanding the anatomy of the 3D printer makes it easy to use it.
However, just like other devices, a 3D printer needs best practice inspections and maintenance procedures, and one of the most sensitive parts is the print bed.
The print bed is responsible for the quality of the first layer and subsequent layers of the printout. A flat and level bed will produce a consistent first layer and a high-quality final print.
Having gone through the different methods of how you can level the bed of your 3D printer, I believe it will not be a challenge to anyone. You can also use a youtube channel that explains best how you can level the 3D printer bed.

Recommended Reading
Is UV Resin Toxic? Things You Need to Know!
Is UV Resin Toxic? Definitely yes! You need to understand some important facts before using UV resin. Use UV resin with protective gear. Find out more!
How Fast Is a 3D Printer?
How fast you can 3D print depends on multiple factors including your printer, filament used, the resolution required, size of the parts, nozzle-size, etc.
PLA Not Sticking to PEI? Easy Fixes and Useful Guide!
PLA not sticking to PEI? Wel, the starting point is to have an effective first layer in your 3D prints. A proper bed adhesion on your 3D printer is a must!