 by Mike Brooks |
Last Updated: February 18, 2022
by Mike Brooks |
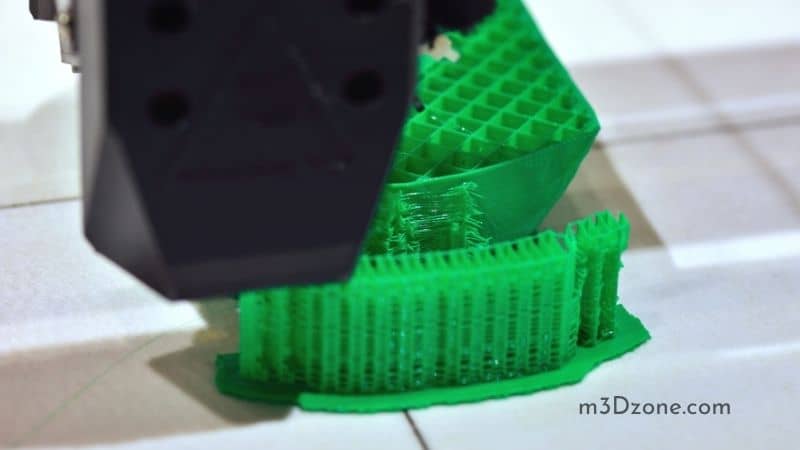
Last Updated: February 18, 2022 Depending on your settings in the slicer and the material you are printing with, you may run into some problems with bed layer adhesion.
As an Amazon Associate, I earn from qualifying purchases. If you make a purchase after clicking on a link I may earn a small commission at no extra cost to you.
Layer separation can be of small or larger concern based on which filament you use.
Quick Navigation
To avoid layer delamination issues, we are going to take you through the easy steps of 3D printing an object with a stronger bond.
Why Are My 3D Print Layers Not Sticking Together?
Layer separation is a major issue that arises when 3D printing, but it came to our attention that it is very easy to get rid of this menace. Stay focused as we take you through a series of these steps:
-
Increasing Your Printing Temperature
To encounter the best solution you should increase the temperature by adjusting your nozzle to enable more molten filament for the first layer stick.
Bed temperature increment at 5°C intervals until you reach the sweet spot that creates print layers sticking together.
To maintain the layer adhesion, you need a bit of extruder temperature twerking to push more filament through the nozzle. Lack of heat in the hot end as your print speed is lower giving you a lot of time for bonding.
Other times it can be low extruder idle pressure caused during setup or failure of the filament material to pass through the nozzle diameter.
-
Adjust Cooling Speed Through Fan
We tested how much strength can lay better adhesion of 3D prints by the amount of cooling air we use. If adjusting the extruder temperature as read in the above section didn’t make a difference, then the problem might be with your cooling fan.
For you to have a better 3D printing chance get a well-recommended fan that could direct cold air to your prints. If you have one try reducing cooling by 10 percent and you will see a decrease or no layer separation in your print.
Noctua NF-A4x10 is an example that has a reputable honor by the 3D print community, with a 4.7 user rating, it is a quiet cooling fan and easy to operate through the slicer.
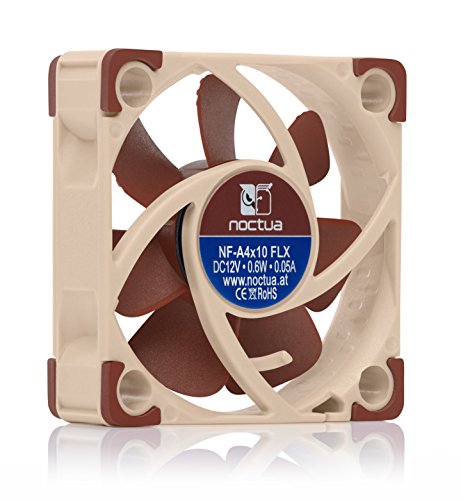
However, to create a fine print, materials like ABS require you not to reduce fan speed but turn off your fans.
-
Lower Print Speed
If your printer does not have enough time to settle and bond with each other, layer separation occurs, so try reducing your print speed by 10 mm per second.
With that in mind, it will enable proper bonding of the next layer that comes in to form a perfect printed object.
Lowering printing speed is straightforward, as you can also definitely use the speed calibration towers that are quite recommended by the 3D printers to set up the instructions in the slicer.
Printing at a lower speed will give the filament more time to heat up and also warm up the print surface a bit with radiated heat from the heater blocker, making it easier for the first layer to stick.
How Do You Fix Layer Adhesion in 3D Printing?
Layer’s adhesion is vital for a fruitful print, in this article we are going to take you through ways of fixing or avoiding layer delamination.
-
Increase Your Flow Rate
If you are 3D printing, your filament extruder flow rate should be high to prevent layer separation. Before you start printing ensure your extrusion multiplier is increased so that it can increase filament flow through the nozzle to enhance a stronger layer bond.
Using a wider nozzle for printing a thick line width will increase the printer’s flow rate reducing layer separation, and reducing nozzle height enables faster combat of the filament onto the print bed.
Increase flow rate in little increments of 5 percent on one layer tab from your printer settings until you find the sweet spot for discrete new layers.
It can cause over extrusion if you go overboard, so increase this in small increments. Increments of 5% per print should be enough. If 0.4mm is your default diameter try one layer with 0.5mm and compare the results with the previous layer.
-
Decrease Your Nozzle Layer Height
It depends on the diameter of the nozzle, for instance, your layer height should be 15-25 percent lower than the diameter for a better printing process.
If your diameter is 0.4mm, which corresponds to 0.32mm layer height, 0.08mm accounts for a 20 percent decrease which lies within the range.
-
Using an Enclosure
For you to gain an ideal print temperature, printed layers require an enclosure to avoid negative external factor interferences.
An example of an enclosure is Creality Fireproof and Dust Warm Enclosure, which prevents temperature extrusion, entry of other factors through the window in case of a PLA.

An enclosure also helps to:
– for protection
-
Draft Shielding Setting Method
Enabling a draft shield will create a wall around the model, which traps hot air preventing your 3D print from warping and delamination.
How Do I Increase Bed Adhesion? Reduce Layer Separation
Prints just not sticking onto the built surface, coming off a few layers after you’ve already left the printer to print.
Adjust the end stop
Start in the center of the bed for a first rough adjustment, and if your printer does not have a sensor-based auto-leveling feature make your way around the surface and repeat for each adjustment point.
Adjust each corner
Move the printhead close to adjusters and tweak them until you get an even resistance for each of them.
While modifying the nozzle head ensure your 3D printer is neither over-extruding nor under-extruding to avoid layer separation.
Here are five easy ways, including leveling, to make your adhesion great again:
- Make sure your printing platform is in good working order.
- Make sure the nozzle is clean and, ideally, heated up so that any boogers will get wiped away by paper from the layers.
- Use a thin piece of paper for stiffer beds and a thicker piece for spring beds.
- You need to manually set the zero position; 3D printers don’t have a way of sensing node touches on the printer layer, they rely on a separate sensor to probe the platform.
- Use your slicer’s settings to increase the width and height for the first layer only.
Why Won’t My Prints Stick to the Bed?
Prints not sticking to the layers is one of the most common issues you’re going to find especially for doing it for the first time. This article explores the world of 3D printing, we have a lot to dive into so let’s get started.
- If your heating bed is not leveled, you may end up with prints coming loose wasting your plastic materials. The solution for this is to level the bed and try doing it again
- Your platform may be warped, you can put a piece of tape on top of that distorted layers
- Nozzle being too far away and too close
- Printing too fast such that the extruder can’t keep up with the amount of material coming
Conclusion
If you have been encountering layer print separation problems, I hope this article helps you solve that issue.
If you have a different problem be sure to check our 3D printing troubleshooting guides to see other errors on our playlist and their problem-solving steps.

Recommended Reading
Essential 3D Printing Skills You Need Right Now!
There is still a lot more to learn and discover in 3D printing. Thats why you need some essential 3D printing skills to gain before you thrive. Lets see!
3D Printing vs Injection Molding
3D printing technologies use an additive manufacturing process. while injection molding involves adding molten material into a mold cavity. Let's dive into it!
What Is PETG Filament? [Ultimate Guide]
What is PETG filament? When it comes to 3D printing, PETG is an acronym for Polyethylene Terephthalate (Glycol modified).