 by Mike Brooks |
Last Updated: April 9, 2022
by Mike Brooks |
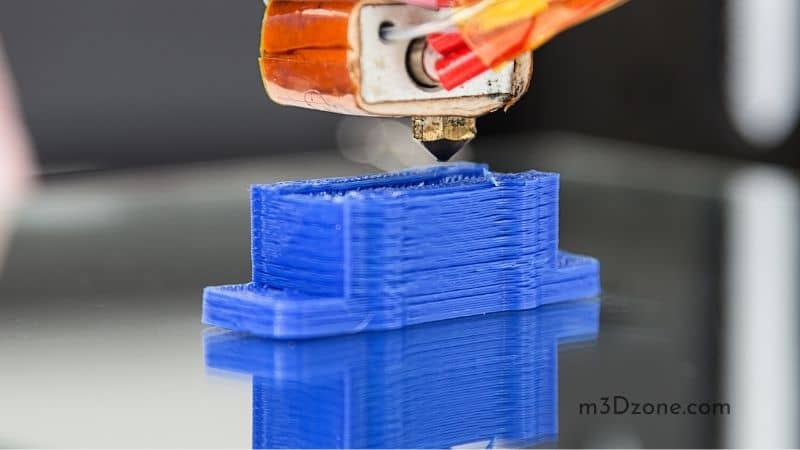
Last Updated: April 9, 2022 If you have used a 3D printer, chances are most likely you have experienced 3d print warping.
As an Amazon Associate, I earn from qualifying purchases. If you make a purchase after clicking on a link I may earn a small commission at no extra cost to you.
Warping lies as one of the most common problems you may encounter in 3D printing and is very frustrating. Luckily, some measures will help fix and evade the problem, leading to more successful models.
Quick Navigation
Failed prints are inevitable in 3D printing, but with mastery of the correct settings for your 3D printer, you may eliminate warping through various techniques.
The settings of your 3D printer entirely depend on the material you are using as print material and its condition.
Having the know-how to juggle around with the settings, considering all factors that may lead to 3D warping will undoubtedly lead to impressive print results and fix warping in the process.
What Is 3D Print Warping?
Warping may be considered as a slight alteration from the original intended design after printing. In some cases, it may be extreme that the entire print is rendered useless and destroyed. For best results, you should check the prints.
Since warping is detected after the printing process, many materials can be lost, leading to increased production costs.
There is no way to revert to warping after it has happened; discarding is the only option. In this guide, we’ll talk about the causes of distortion and various ways to avoid it.
Why Does Warping Occur?
The materials used during the 3D production processes are thermoplastics, meaning they change properties at specific temperature ranges.
The process entails heating the filaments beyond their melting point, where they change into liquid form that can be easily fixed on a build plate.
During heating, the thermoplastics expand, and then when cooling, they shrink down to form a solid.
This transition leads to movements in the plastics which is the sole cause of warping; colder layers tend to pull on hotter layers on the new surface as they cool.
If this occurs when the layers below are still hot and the upper ones cold, the print will lose its grip on the build plate and, in return, curl upwards; hence warping occurs.
Dishearteningly, the curling may even show up on finishing what was to be otherwise an excellent fine print. If only the temperatures of the whole 3D image could be maintained at a set range, warping would be avoided entirely. However, this is close to impossible.
Instead, you may try to maintain the exact same temperature as much as possible to a specific range. This ensures that the print model can stick on the build surface during the whole production process.
Fixing the Print Off the Print Bed Through the Glass Transition Temperature
Mostly, warped prints can not be set, and the whole model ends up being destroyed. Alternatively, if the print model is light and not too thick in volume, there is a way you might remodel it.
This can be achieved by heating the print moderately almost to its glass transition temperature enough to be soft sufficient to remodel it.
You’ll need to improvise for the print bed using a large metal surface, preferably a frying pan, enough to hold the print sown the way it was in the print bed.
A normal hairdryer would do just fine in the heating process. The dryer should be full-on power and even move it to heat your print.
After heating, you may remodel the print now to the desired shape and bend. Before cooling, you’ll need to hold it down to avoid deformities once again.
You may repeat the process until the print assumes the shape you are after. The dryer comes in handy because taking the print back to the print bed or heating the pan will only heat the bottom of the print. This will mean you are heating the whole print all over again for results.
You might like: How Much Does It Cost to Run a 3D Printer Per Hour?
Ways to Prevent Warping
a) Use a heated build plate
Before heated build, plates were rare to come across, and printed 3D prints tended to cool quickly even before production was completed. Due to this, warping and curling were almost standard in every print. For now, most machines are equipped already with heated beds.
One of the most advocated ways of avoiding warping is using a heated build plate. The build plate seeks to keep the material at a temperature just below when it solidifies. This ensures your 3D print stays flat and is still connected to the build plate.
With the 3D print cooling more slowly, the chances of warping the stress caused by contractions are reduced.
However, you should ensure that the temperature used is the right one depending on the material in use. Properties differ for different materials and filaments despite the fact they are all high-temperature materials.
You need to read widely on the filaments in use and the temperature range of solidification for results; otherwise, the heated bed won’t offer much in warping cases.
Heated beds are not a total guarantee that warping will be evaded, combining the technique with other methods to lower the chances.
Still, on that note, the heating parts do not comprise the whole bed, meaning it’s not the entire bed that does the heating- the edges might not get enough heat and may end up warping. It’s worth noting larger prints may warp, unlike smaller prints.
b) Use of adhesives on the first layer
The adhesion between the bottom layer of your print and the print bed has a role in preventing warping. This is usually achieved by coating the bed with an adhesive or sticky substance before starting the actual print.
Before using the adhesive, it’s recommended you do a test print of a small part to ensure it’s working well. With the print stuck on the print bed, this may lead to damages when removing it.
For the adhesive technique to work well, you should ensure the print is smooth and clean. Traces of oil and grease will only worsen and weaken the adhesion forces.
The adhesive should be applied to the glass plate. Also, adhesion methods differ from material to material, hence the need to understand the material used.
There are a lot of products that will help your print stick to the printing base. Here are a few of them, you may first experiment or even combine them for effective results:
1) 3DLac
3DLac is a spray format consisting of a chemical formulation specifically for 3D printing to solidify the pieces. Its application is pretty simple as you only need to spray the product on the printing base before the printing process.
The bed does not need flooding but spraying from a hand’s distance ensures the chemical is distributed effectively. An alternative for the 3DLac is the Nelly hairspray, as the same company manufactures them.
The only difference is that the concentration in 3DLac is a more improved formulation and lacks the smell as in the Nely lacquers.
2) Wolfbite
Wolfbite is a commercial 3D chemical produced explicitly for the adhesive and grip of your 3D printing parts. A variant of the product from its official website; hence necessary to test your preferred product and material in use.
3) PEI sheets
The sheets (check at Amazon) come in already laminated and easy to place on the printing bed. They come in various sizes and brands; hence easier to spot the one that will work for you and the right size for your printer. Even the thick ones are easy to trim according to your preference.
Some come as stickers and are easy to install by placing them on the printing bed. Unlike tapes, bubbles are not a problem here as they will bond with almost all materials.
4) Kapton tape
Kapton tape is commonly used in welding and electronics because it can withstand extreme temperatures.

It can be used in 3D printing to give the adhesive bond needed by the print. Kapton tape can be used with other methods such as the 3DLac sprays to provide a boost on the grip.
The Kapton tape works too on prints with wider widths and is easier to apply on the printing surface.
However, some residue may be left after the production process, but alcohol tends to take care of it effectively.
5) Masking tape
At some point, we have all used masking tape (check at Amazon) for quick fixes and repairs, whether at home or the office. It’s relatively cheap as compared to Kapton tape and offers good adhesion.
6) Glue stick
Glue stick (check at Amazon) is a favorite alternative, and some print companies offer the stick as part of their purchased products. Application is just applying glue to the build plate, and that’s it.
Alternatively, dilution with water is acceptable, and a brush is used to smear the glue more evenly on the print bed. This makes cleaning the glass easier as only a tiny fraction of the glue will be used.
7) ABS Solution
A few small cut pieces of ABS may be diluted in acetone in a container to form an ABS solution (ABS juice). The acetone ensures the ABS dissolves entirely and forms a paste-like material.
By use of a brush, (check at Amazon) you may apply the ABS juice to the printing bed. Printing on other materials needs you to look for the appropriate chemicals and the proper application on the printing surface.
c) Regulate the temperature during the production process
The monitoring of temperatures should be on the printing machine, and the surrounding air temperature is essential in warping. This can be achieved through:
Maintain room temperature: ensure the doors and windows are closed to prevent cold air from messing with the 3D printing process.
Adjust cooling: extra care is to be observed here as the filaments need to cool to allow the melted plastic to solidify for accurate bridging.
Cooling fans could be turned off or lower the speeds just for the first layers to help even the temperatures.
Using enclosed print chamber: Working with an enclosed printer helps maintain a constant printing process. You may also build your enclosure if the printer lacks one.
d) Choose the right settings for the first few layers
The calibrations are essential in preventing warping. A good distance between the printer’s nozzle and the plate is important in the first layers of your print which also, in turn, affects the whole model.
The platform should be as closer to the nozzle as possible to prevent the material from cooling hence losing its ability to stick to the platform. All following layers must observe the rule for them to adhere to one another.
Warping is less common in small prints as compared to larger prints where it is evident. When printing larger prints, it is advisable to use filament with a lower shrinkage, preferably PLA-based ones.
The print model may be adjusted with ABS materials (check at Amazon) that the walls are thinner, reducing the infill material. The lesser the infill material, the lower the chances of warping after cooling the material.
e) Keep in check the Z coordinates
The first few layers on the build plate are key to a successful print model. Printing the perfect first print layer can be achieved by correctly checking the output coordination of the z coordinate before the printing begins.
If the Z-axis starts at a higher point, the material will have to travel longer before contacting the print bed. The material cools more and won’t stick on the glass well.
With the Z-axis adjustment, the printer’s nozzle should not come too close to the model as it may result in further complications.
If your print has a small printing surface, adherence will be difficult thence brims and rafts can be added for further adhesion.
For the right adjustment of the coordinates, level sensors will come in handy. You can still do the corrections manually, but the sensors will provide the extra help needed.
Some printers already have self-adjustment sensors, and you may purchase one and install it in the printer for a good initial layer on your model.
Conclusion
Making high-quality print models isn’t just getting the 3D printer, filling it with filament, and printing your desired model. During the process, you will be frustrated as a lot of things can go wrong.
Perfecting printing the desired 3D model requires a deeper understanding of how your filament material in use reacts to changes in temperature and the temperature difference of the filaments.
The skills are easy to learn but technical to master as it requires effort.
Solving problems that may arise during printing requires playing around and experimenting with the printer’s settings.
Warping is one of the common problems you’ll encounter in 3D printing. With PLA filaments, it’s rare but can still occur.
If you observe the steps and measures outlined above, you’ll be able to produce prints perfect from base and layers. Reducing the initial layer speed also helps big time in curbing warping.

Recommended Reading
3D Printer Extruder Clicking? Why It Does That?
3D printer extruder clicking is a common issue for 3D printers and can be caused by many different things. It could be an issue with the stepper motor...
ABS vs Nylon in 3D Printing. What Is the Difference?
ABS vs Nylon in 3D printing: if you need durability, ABS is a good choice but if you need flexibility, go with Nylon. Let's find out more!
Can You Pause a 3D Print Overnight? Pros & Cons.
Can you pause a 3D print overnight? Yes, by selecting the “Pause” option from the display screen. When you want to start printing again, use the resume option.