 by Mike Brooks |
Last Updated: May 2, 2022
by Mike Brooks |
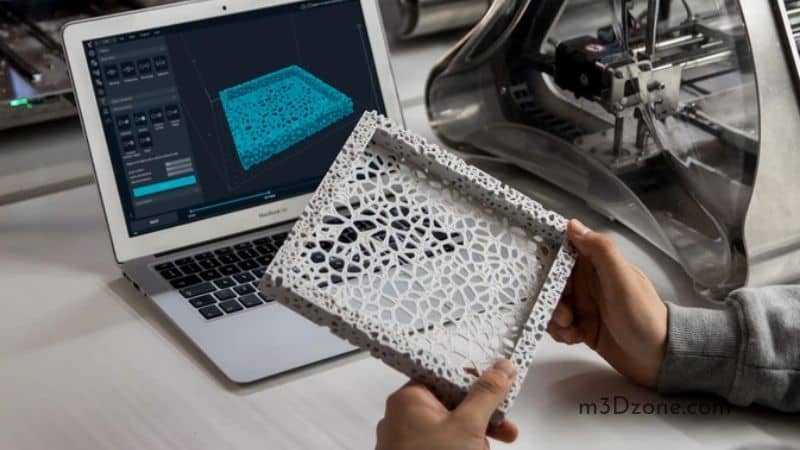
Last Updated: May 2, 2022 3D printed projects should be able to come out perfectly from a print off the bed, but it never happens that way in most cases as they are not of the same material. Before finishing, the printed part of a project will display visible lines and an imperfect surface.
As an Amazon Associate, I earn from qualifying purchases. If you make a purchase after clicking on a link I may earn a small commission at no extra cost to you.
For your print to look good, you’ll need to apply the finishing process, wet sanding works well after you remove support material by softening the rough edges and cutting off the extended filaments from the print.
Quick Navigation
This is always a result of support structures or brims and could end up ruining your print if done incorrectly. What’s the best way to remove supports, and rims that come with your already finished 3D print?
How to Remove 3D Print Supports Structure
Let’s dive into 4 easy ways on how to remove 3D prints structure.
1. Remove the Support Material With Reasonable Force
Before removing support, the print bed should be allowed to cool for some time before manually removing it by applying some force. With the print in your hands, grabbing, turning, and twisting should be used and works in most cases.
You can use a rubber mallet (check at Amazon) to weaken the adhesion by hitting the object sideways carefully. Always aim at the rigid surfaces no to damage the print. After the forces are weakened, you may apply pressure and get the print off.
If there is a gap, you may slide in the tip of a screwdriver (like this one), and tapping the handle will lead to the print falling off.
2. Using a Flat Object
Having a flat object that can easily fit between a printed object and the bed is a great tool. Some of the printing gears come along with a spatula (here’s a premium kit), but you may choose a painting knife or a razor blade if that does not work for you.
With the right tool underneath the 3D print, additional force in multiple directions, side to side, then up and down, tends to weaken the adhesion and the part pops off.
Having a finer blade is advisable, preferably a razor blade, and you should be careful. That way, you can avoid hurting yourself in the process. Always look for a razor with a handle and blade designed to remove 3D prints from the bed. Having needle nose pliers will come in handy to help remove the support easily.
With finer blades, it’s almost inevitable to damage the print either by cutting through the surface or creating wrinkles and stress marks on the surface that will affect the next print. The wrinkles may be softened by high grit sandpaper. Extra care has to be observed on using blades.
In addition to that, a flush cutter can be used to cleanly snip away excess material after detaching it from the print.
3. Alternating Temperatures
Mostly, heated beds tend to form bonds with the printed material. After the print is completed, the heated bed is allowed to cool down completely. Sometimes, the print peels off with ease. Depending on the material property on the print platform, whether glass, aluminum, or plastic, the different amounts of contraction as the bed gets colder will eventually lead to breaking the bond.
You might be interested in: Best 3D Printer Build Surface
Alternatively, you may toy with this behavior by using extreme temperatures and dropping a cool pack on the 3D print to increase the difference. Using canned CO2, when the liquid changes state and evaporates, it absorbs energy, leading to rapid cooling down of the 3D printer.
Having the build plate with the object in a freezer for close to 30 minutes may also work in some cases. This will cause the plastic to contract, leading to the print bed loosening its grip on the print.
Spraying compressed air in your stuck prints will cause a temperature change, and this will lead to your print popping off.
4 Using a Solvent Solution to Dissolve the Adhesive in Custom Supports
Solvent solutions should be your last option, as many tend to leave a coating of blue tape. Pure anhydrous isopropyl alcohol is recommended as a cleaning agent. Avoid cheap and bargained alcohols for electronic cleaners. These alcohols contain more water which causes slow drying, induces oxidation, and may leave residues.
Isopropyl alcohol is the agent for cleaning 3D printers since it has the lowest contaminants and less water content. Diluting the solution will prevent drying out and will hinder the re-application of the solvent.
Isopropyl alcohol is put on the edges of the print and let to soak close to 15 minutes for easy removal. For instance, where glue is present, warm water will work the trick. Using hot water will deform the print as it might cause glass or plastic transition.
Having a putty knife will come in handy since you can easily pop out the stuck parts of the print.
How to Make 3D Printing Supports Easier to Remove
When making a 3D print, occasionally, you’ll come across support materials that are difficult to get rid of and even wished there was a simpler way of removing them. Implementing support settings includes support density, the common lines support pattern, and the Z support system to provide a gap between the supports and the model.
The support interface thickness also helps give the material touching the model thickness.
With the right information on removing support, modifying the printing supports makes it easier for the removal process. With the right tools, you’ll no longer have the frustrations when removing supports.
Avoid printing with extreme temperatures with the supports being too close to the print objects as this leads to fusing, which hinders the removal of the supports after. The cooling process, the print temperature, and the support distance should always be balanced for easy removal of support structures and a good print object surface afterward.
Changing the support distance between the support and the print object is a good way to ensure easy removal of the supports after printing.
When Do You Need to Design and Remove the Support Structure?
The 3D printing technology you’re going to use will affect the type of structural support you’ll use for the print process.
Fused deposition modeling (FDM) printers successively extrude filament layers meaning if your print includes an overhang that is not maintained by any support, your print will fail. Supports are very useful when it comes to FDM prints.
If you decide to use Selective Laser Sintering, the powder will tend to act as a support when your part is being printed. This powder-based printing ensures you have unlimited designs that can take any shape you desire without support limitations.
Types of Standard Support Structures
The type of support structure you will require will greatly depend on the 3D printing technology you use.
For FDM printers, the common support structures are;
-
Lattice type
Holds parts steady and recommended with steep overhangs and columns. They are common since they are easily generated and are compatible with most 3D prints.
-
Tree type
If your 3D print design has many overhangs but is not too vertical, the tree-type support structure is the best to use. The support starts from the base and progresses into thin branches, useful in selectively supporting support parts.
Stereolithography printing (SLA) works on a principle where liquid resin is solidified. For this, support structures are required to attach to the prin to prevent warping.
Supports tend to be thin to save both material and printing time. The shape, orientation, and weight of the print entirely affect the location of supports where they contact the model. This process is facilitated by software that does the calculation. These prints are easy to remove manually and have no problems.
Are Support Structures Necessary?
Support structures always aim at ensuring the printability of a part during the 3D printing process and by their name, provide support during the printing phase. They secure a domain being printed to the bed, providing all aspects that are attached to the main body of the printed part and this in return helps perform deformation. The support structures used are later removed.
If your print has overhangs and holes, it can be challenging to print without the support structures. The features may collapse or alter the shape of the whole print hence the need to have support structures.
Besides that, supports function as heat dissipators in cases with metal 3D printing where high temperatures are involved. Support structures prevent residual stress caused by high temperatures during the whole printing process by drawing heat away.
How Do You Remove Supports From Resin Prints?
The big question is always when to remove resin or supports from your prints before or after curing? Supports should always be removed from resin prints before curing as uncured resin plastic tends to be softer than cured resin plastic, hence easier to remove.
Marks and breaks tend to appear on the model if supports are removed from cured prints, which ruins the whole model. You might decide to use 3D print resin without supports, which will work, but if your design model has overhanging parts such as limbs, it is advisable to employ support structures. They tend to provide a strong foundation to the overhanging parts.
Conclusion
As part and process of 3D printing, supports, rafts, and brims are necessary no matter how inconvenient they seem. They are unavoidable if you are after a good 3D print. Thus, you’ll need to work and understand how to handle them and not avoid them.
Tool quality is important as having the right and great set of tools will facilitate the proper removal of the support structures. The process will require skill as being too aggressive will lead you to damage your 3D print.
The flexible hacks will help unstick your prints from the bed, and you get to choose which one suits your printing needs and requirements.
With all legal aspects considered including the issue of rights to data generated by machines that are not personal data related to an individual, 3D printing should be fun.

Recommended Reading
What Is SLS 3D Printing? Selective Laser Sintering Guide.
What is SLS 3D printing? SLS technology uses a high-power laser to sinter small polymer powder particles into a solid structure 3D model. Let's dive into it!
Resin vs Filament 3D Printer. What Should You Choose?
Resin vs filament 3D printer dilemma. In our final analysis, resin printers will cost you far more than the FDM printers. Let's find out why!
What Is FDM 3D Printing?
Fused Deposition Modeling(FDM) and Fused Filament fabrications (FFF) are the same. The FDM or FFF uses additive manufacturing 3D printing technology.