 by Mike Brooks |
Last Updated: February 3, 2022
by Mike Brooks |
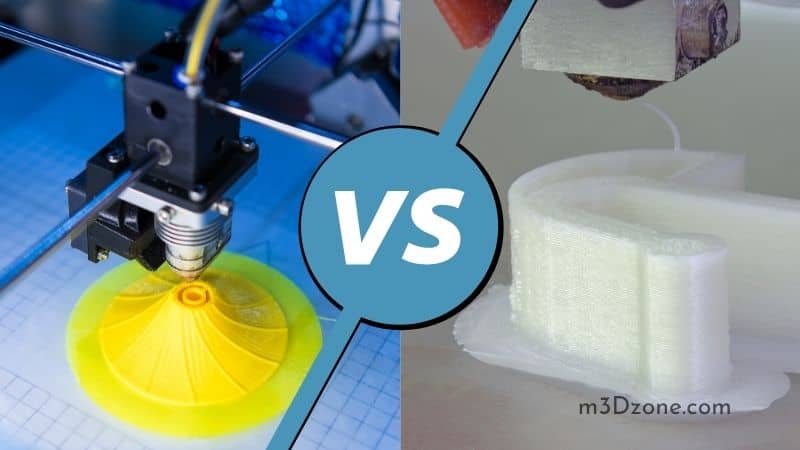
Last Updated: February 3, 2022 Raft, brim, and skirt are popular techniques used in improving print results. But which one do you use, when do you use it, and where? The choice of the technique to use will depend on your experience or assessment and the expected errors.
Instead of using a scheme, it would be best to consider each workpiece at which point support constructions are suitable. The use of the support constructions in printing means you’ll have to rework.
Quick Navigation
In the 3D printing world, it is agreed that how the first layer goes down is a significant determinant of the quality of the print. The first layer acceptance is an essential step in ensuring the best results. 3D printing bed adhesion is where a raft, skirt, and brim come into play.
But where, how, and when do you use them wisely?
Raft 3D Printing
What Is a 3D Printing Raft?
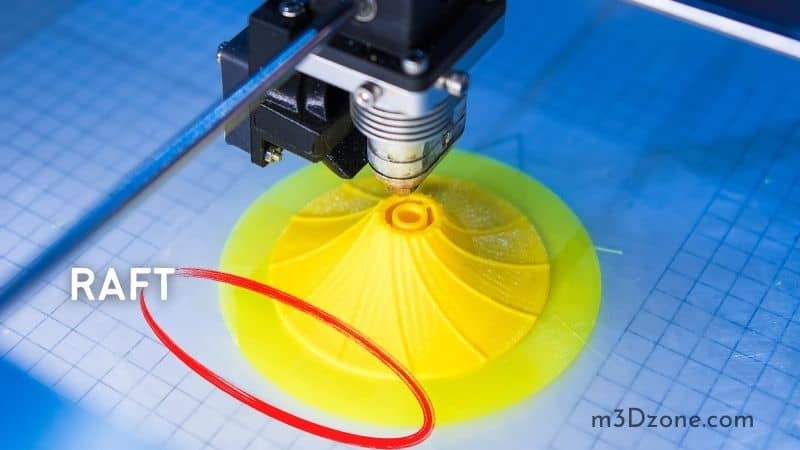
A 3D printing raft refers to the horizontal surface that comes under the printing object. The surface comprises several layers that come with a particular fill percentage, and it extends outward some distance away from the object.
Why Do You Need a Raft During Printing?
The raft’s primary purpose is to ensure better bed adhesion. If you use some materials such as the ABS, you require a raft during printing. You start by laying the raft first to a particular layer depth, and then you print the object on the top of your raft.
A small distance exists between the raft and your print object. The gap ensures you enjoy a seamless time removing the raft after your object cools.
The raft has more surface area that ensures better layer adhesion. It helps to reduce warping in the print object as the raft warps at the edges, which leaves the bottom of the object level.
You can also use rafts to offer enhanced stability of objects with smaller footprints. The raft also comes in handy in offering solid foundations, and it is essential in printing objects that may be heavy at the top.
Other Uses for Raft
You can use it to compensate for the inaccuracies in the build plate calibrations, scratches, dents, and even-out warped heated bed.
As such, when to use a raft depends on various factors, including the nature of the print bed, the material, and the workpiece properties.
For instance, if you use an ABS material and an FDM printer, you have to use a raft. The material is known to warp, resulting in an unattractive and unusable workpiece, especially the first layer. A raft helps to prevent warping.
Today, most printing beds are straight, depending on the model, but the adhesion properties may still be insufficient for some workpieces. Even with a straight printing bed, you should use the largest possible raft to ensure a good bond for the first layers.
All support structures, including rafts, have their disadvantages. For instance, the supports must be disposed of at the end, and you must separate the material from the workpiece.
Separating the additional material from the workpiece can be challenging as it is strongly bonded to the workpiece. After separation, you should rework to achieve a smooth surface as the separation results in a rough surface.
Setting up the raft is a seamless and effortless task as you only need to take the largest of the surface on the print in relation to X and Y coordinates. Increase the dimension with a set factor and then use a few layers to lift the workpiece off the print bed.
Furthermore, you only need to feed the correct settings to a slicer, and it will handle the functions.
Some essential terms to understand about rafts include:
Separation Distance
Separation distance refers to the space that is between the bottom layer of the print and the top of the raft. The distance ensures there is a balance to ensure the print adheres to the print raft and there is an appropriate air gap to facilitate easy removal when the printing is over.
If you print the workpiece direct onto the raft, you’ll have challenges separating them. When you print the first layer, the filament cools down, ensuring there is no strong bond. An ideal air gap is about 0.1mm.
First Layer
The raft base layer is the layer on the raft’s base. It’s essential that the base layers adhere correctly or the rest of the print doesn’t adhere correctly.
Here, you should set the printing speed and thickness to ensure the best adhesion. You should print the layer at low raft speed and ensure it is relatively thick but doesn’t waste material.
Raft Top Layer
The top layer refers to how many layers on top of the raft? The layer forms the surface where the print object’s bottom will rest on.
The thickness of the top layer will determine how good the surface of the print will be. If the workpiece base is large, you should set the thickness value accordingly to ensure an excellent surface finish. If the base is small, the print surface bottom at the finish may not be essential.
Rafts With Double Bed Adhesion Extruders
Support constructions with a single extruder are printed using the same material as the workpiece.
With double extruders, you have the option of using support material that eliminates or minimizes the disadvantages.
High-Impact Polystyrene (HIPS) or polyvinyl alcohol (PVA) are examples of support materials used for rafts. HIPS comes with similar properties as ABS, but you can dissolve it in chemicals such as Limonene.
If you use one of the materials to build your raft, you can immerse it in the appropriate chemicals, and it’s freed from support structures.
How Do You Install Rafts in Cura?
You’ll find the creation of a raft in the “Build PLate Adhesion Type” settings in Cura. The selection print setup is below the material selection.
Cura distinguishes between the “recommended” and “custom” options. If you are a beginner in 3D printing, you should go for “recommended.” Everything is self-explanatory, which will help in working on your first print.
Although the custom option is a little complicated, you’ll get the best out of your printer if you choose the best settings.
What Is a 3D Printing Brim or ‘Sidewalk’?
A 3D printing brim is a close relative as they perform the same functions in the printing process.
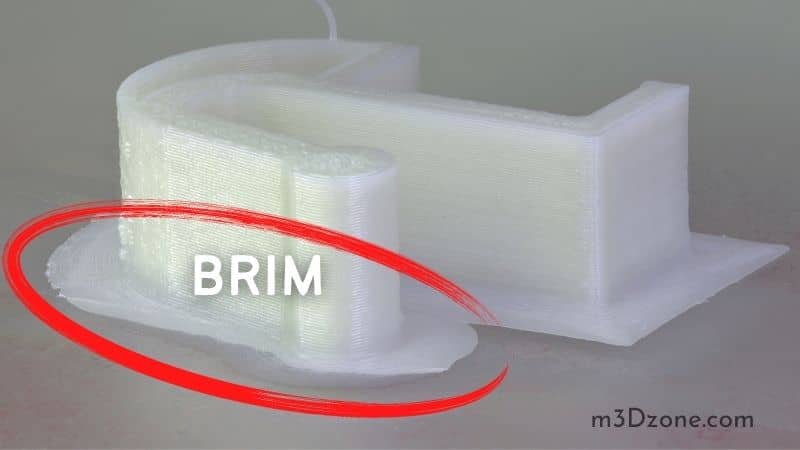
If you are using ABS material, it’s vital that you use Brim as it prevents warping. It comes with additional multiple layers on the outer edges, which enhances stability by enlarging the base of the workpiece.
When you use brim, the bearing surface is enhanced, which helps mitigate the print bed’s poor adhesion force.
You can use brim together with other support structures as it is possible to create a large base and increase stability many times.
Small legs and columns can be provided with a brim as a precautionary measure.
What Is the Difference Between Raft 3D print and Brim?
As mentioned earlier, you can think of brim as closely related to a raft. Both help with adhesion, and you can use them to stabilize objects with small contact points with the print surface.
However, there are differences between the two.
For instance, a raft refers to a base that offers stability by extending under the entire print material to enhance bed adhesion.
A brim doesn’t have any connection with the object’s underside. It only extends outwards from the perimeter of the object.
Both brims and rafts can come in handy in stabilizing objects with negligible contact with the print. However, you may prefer a brim to a raft as its contact with the print object is in the outside edges of the print object.
Additionally, some print materials are better off with a brim than a raft.
For example, if you are using cheap ABS or you are not using the appropriate printer settings, the ABS material can warp. As such, it will be best to use a print brim around the material to help in adhesion.
A narrow support structure with a smaller surface area on the bed can pop out of the print bed. Therefore, it will be better to use brims.
Additionally, it will be easier to separate a brim and a narrow object than to remove a raft. As such, there are fewer chances you will damage your object after the printing process.
Like other support structures, the brim also wastes material that is not part of the workpiece. However, brims help to keep the waste within modest limits.
Print reworking is not necessary with brims as it is welded on the bottom layer of the object and doesn’t undercut it.
What Is a 3D Printing Skirt?
Skirts are popular in printing, and you add one at the start of every printing process.
So, what is a skirt?
It is like a brim, but it doesn’t come into contact with the edges of the 3D-printed object.
Skirts are a few layers thick and have various uses. For instance, you can use skirts to preview how the equipment is functioning. In the early days of the printing process, it was common to check how the printer is working before starting the printing process.
This helps to deal with the minor problems before they become major.
Initially, people used Benchy to eliminate the errors in the printer settings. However, Benchy costs a lot of time and material, forcing people to turn to skirts. The printing process is detached from the actual project, which allows you to pose and use other settings.
When should you use a skirt?
It would be best to use it at all times before printing. You shouldn’t start printing until you ensure that all the settings are working properly.
You can lay down the skirt after turning on your printer and giving it time to heat. This helps you identify if there are any issues with the printing process.
For example, maybe the filament is not melting correctly, or there may be adhesion challenges. You can also see from the bed whether the print bed has been leveled perfectly.
How Is a Raft Different From a Brim and a Skirt
The main difference between a raft, brim, and 3D skirting is in how they work. A 3D printing raft forms the first layer of a horizontal mesh of filament.
A good raft is especially used with an ABS filament as it is more prone to warping. Besides preventing warping, a raft also enhances bed adhesion which helps the initial layers of the print to support the entire print.
A brim is similar to a 3D printing raft, but it’s only attached to the outer edges of the print and not underneath it. You can use it interchangeably with a raft as it has a similar function.
Finally, a skirt is an outline that forms around the print object. Unlike a raft and a brim, a skirt doesn’t touch the print object. It helps to ensure that the extruder has a smooth flow before starting the printing process.
It helps to save money and effort as it helps detect any issues with the printer before starting printing.
Conclusion
Is there a difference between raft, brim, and skirt? The difference between the three is in how they work. The raft covers underneath the print object while Brim touches the extended edges only.
The skirt doesn’t touch the edges of the print, but it is crucial in ensuring your equipment is working correctly.

Recommended Reading
3D Printing History [Timeline]
3D printing is state-of-the-art technology. Its history dates back to the early 1980s. Dr. Hideo Kodama, a Japanese scientist, is one of the early minds...
What Is a Resin 3D Printer?
So, what is a 3D resin printer? A resin 3D printer is a machine that uses light to convert models to prints. By directing UV light onto resins ...
Wall Thickness 3D Printing. Do It Perfectly!
What is wall thickness 3D printing? It is the distance between one side of your 3D part and its opposite surface. Recommended thickness to ensure the...