 by Mike Brooks |
Last Updated: May 18, 2022
by Mike Brooks |
Last Updated: May 18, 2022 What is an elephant foot in 3D printing, and how do you get rid of it?
An elephant foot is one of the most common problems that you can encounter with 3D printing. Although it may not wreck our printed object, it ensures that more rework is needed after the printing process is over.
Quick Navigation
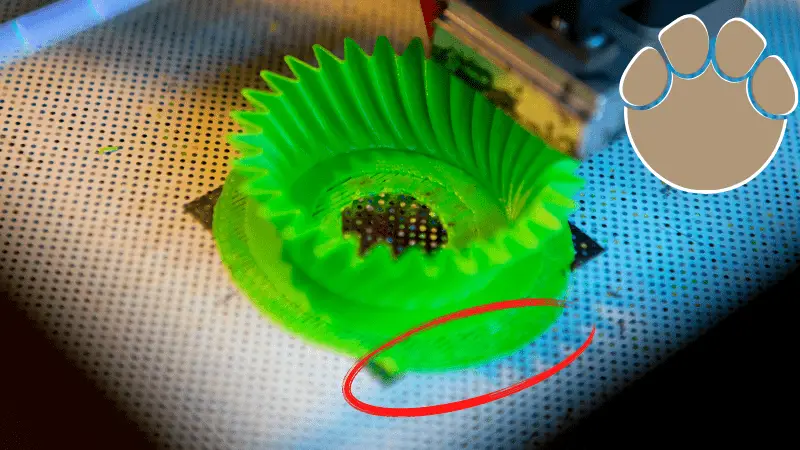
Elephant foot problems occur when the 3D printer outputs more material than required for the first layer of the printed object. When you print without using a raft, you notice that the first layer’s width is more extended than the others.
So, what causes elephant foot, and how do you remedy it?
3D Printing Elephant Foot. What Causes Elephant Foot 3D Printing Issue?
An elephant foot is sometimes unnoticeable, but it becomes a significant challenge if you are printing objects for practical applications. The challenge decreases tolerance significantly, which makes it hard to fit pieces together.
The elephant foot is a result of large prints as it is caused by the weight of the printing object pushing down on the first layer. If it’s not cooled, the weight results in a bulged first layer.
The weight pushes the filament to the sides of the extruder, which makes the bottom of the model wider. To counter this challenge and produce the intended width of the 3D printed object, the printer should have several layers.
The elephant foot phenomenon also results from too aggressive print settings for the first layer and poor calibration of the print bed.
How Do You Fix 3D Printing First Layer Issues?
Elephant foot is a result of an uncooled first layer. If there is no sufficient cooling or the temperature of the print bed is very high, the first layer will not cool well, resulting in an elephant foot.
The bottom of your 3D print may not be smooth because the nozzle is too close or too far from the print bed. If you have tuned your print bed to insignificant microns from the nozzle opening, it’ll be a challenge for the liquified plastic to get away.
You only need a good bed leveling and a good bed surface to deal with the challenge.
You may also require to add a Z-axis offset, although this isn’t recommended before you’ve tried other solutions. Most printers have the option of setting the Z-axis offset. When you increase the offset to a positive range, you lift the nozzle away from the print bed.
So, what are the solutions to dealing with an elephant foot?
Level the Print Bed
Is the nozzle of the 3D printer very close to the print head?
If yes, it might cause the first layer filament to be pushed to the sides of the print object, resulting in elephant foot issues.
It would help if you can use the manufacturer’s instructions to calibrate the print bed.
Calibrating the print bed also prevents other challenges. For instance, if there is incorrect nozzle height from the printing bed, you may end up with scratches on the 3D model.
If there is an excess distance between the nozzle and the print bed, you may experience insufficient first-layer bed adhesion. Insufficient adhesion of the layer results in failed prints.
It will help a lot if you are careful with the settings of the first layers.
Print bed leveling and adjusting the nozzle height will go a long way in dealing with an elephant foot.
Minimize the Print Bed Temperature
When you want to set the ideal print bed temperature, it’s essential that you find the best balance. You should ensure the initial layer gets enough time to cool down to be stable.
If the printing bed is very hot, the soft bottom layer is compressed by the weight of the object. If the bed is cold, you may experience warping, an effect of wrong printer settings.
You should adjust the printer settings slowly, just like with other printer settings. If there is no positive effect after several steps of setting adjustment, the bed temperature change may not be the right solution.
Print Using a Raft
Using a raft in printing your 3D project goes a long way in helping to fix the elephant foot. The raft function helps to create a grid under the 3D printed object. You should remove the raft manually after the printing process.
Using a raft is a helpful workaround as the phenomenon happens between the first layer and the bed. As such, it helps to take the hit for you.
Add Chamfers to the Model
Getting rid of the problem is not an easy task, but it’s not impossible. Instead of tweaking your 3D printer to eliminate the issue, you can alter the existing model.
You will need to place a diminutive 450 chamfer at the bottom frame of the print to get rid of the issue.
Clean the Print Surface
A dirty printing surface can also cause first-layer issues. You should ensure your printing surface is clean and neat to ensure you end up with the expected results and better print quality.
It would be best to use a paper towel to wipe all the dirt from your print table before every print.
Bonus: Video
How to Stop Elephant Foot 3D Printing in Cura Slicer
If you are experiencing elephant foot challenges with your Cura slicer, there are different remedies that you can employ. These include:
- You can have a horizontal expansion of the initial layer
- Print a single layer to check layer height and bed leveling
- Print using a raft
- Reduce the printing speed
- Use a brim
- Reduce the nozzle temperature and the bed temperature
- Z height adjustment
Other 3D Printing Issues
Besides the above issues with a 3D printer, you may also experience instances where you cannot print a simple model successfully. Some of the common problems you can experience with 3D print include:
- A defective print
- Nothing is printed
- The print may not be visually appealing
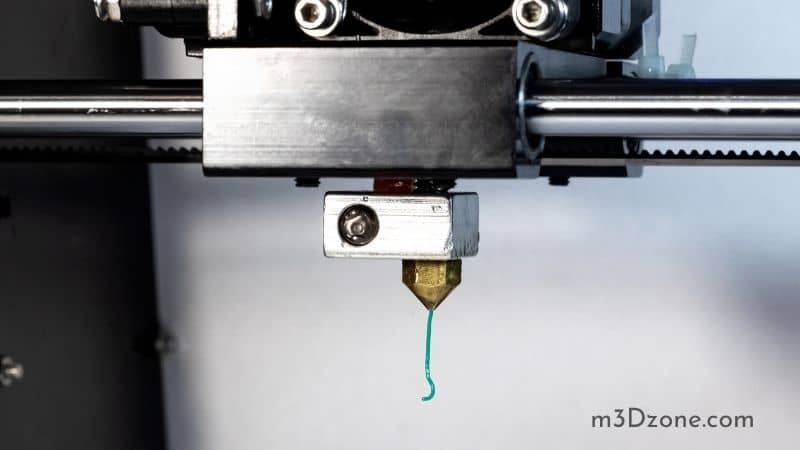
Sometimes, you may make settings in the software depending on the model, but still, the slicer prints nothing. On the other hand, the 3D printer may start the printing process, but stops halfway. Instead of printing the material, you may only have air produced.
If you are having challenges with your 3D printer, you can check the issue with the filament. If your 3D printer has a completely visible filament, you can check to see if the issue is an empty spool. If that’s the case, you need to deal with the issue by loading another filament roll.
Another issue you can encounter in 3D printing involves not having enough distance between the print bed and the nozzle. If the printer is not empty and the printer’s head moves smoothly, but there is no material extruded, it can be an issue with the nozzle.
A nozzle closer to the bed may make it a challenge for the filament to escape.
In some cases, the print may not have the first layer, which increases the likelihood of not adhering to the print bed when the printer extrudes the filament. Additionally, the nozzle blockage can be a result of a jam of the filament at the hot end.
You can solve the issue by slightly adjusting the nozzle height upwards. Luckily, most 3D printers enable you to adjust the Z-axis offset in the settings. Increasing the offset to a positive value moves the nozzle from the printing bed.
Ensure you don’t set the offset too high as it can make it a challenge for the object to stick to the print bed.
You can also lower the print bed to achieve the same effects. However, if you go for this solution, you’ll have to recalibrate and realign the print bed to ensure you get consistent results afterward.
A blocked nozzle can be a frustrating experience during the printing process. You start the process, but the nozzle doesn’t produce any filament.
The blockage can be a result of material left in the nozzle when you change the filaments. It can happen after a filament breaks off at the hot end, which stops the new filament from being extruded.
To prevent nozzle blockage, it will be vital to ensure you perform regular maintenance of the 3D printer. This will prevent blockages from jeopardizing the print.
Old filament and filament residue can sit in the nozzle for some time before it causes actual blockage. Although you may not notice the filament residue, you may see signs in the print quality.
For instance, you may notice dark filaments on the print or dents in the shell.
You can use the Atomic Pull, also known as cold pull, to clean the blocked nozzle. Other methods you can use to unblock a clogged nozzle include the use of a needle.
If you wish to use the method, remove the filament and then go to the control panel of your 3D printer and select the “Heating Nozzle.” Adjust the temperature of the filament still stuck in the nozzle.
If the blockage is extreme and you still have clogs in the nozzle despite the cleaning efforts, your last choice will be to disassemble the entire hot end. It will be best to understand how the reassembly will work afterward.
The first step involves removing the filament. After that, follow the instructions on the manufacturer’s manual to disassemble the printer’s hot end and clean it well.
Conclusion
If you are printing without a raft, you may notice that the first layer of the print is larger than the rest of the layers. This is known as an elephant foot which is a common issue in 3D printing.
In our guide, we have provided the possible causes of the phenomenon, how you can prevent it, and how to remedy it if it occurs.

Recommended Reading
What Is FDM 3D Printing?
Fused Deposition Modeling(FDM) and Fused Filament fabrications (FFF) are the same. The FDM or FFF uses additive manufacturing 3D printing technology.
3D Printer Feed Rate. Things You Need to Know!
The 3D printer feed rate determines the overall 3D print speed. It measures how fast the printer moves on all four axes; a higher feed rate signifies high...
First Layer Curling. Detailed 3D Printing Guide!
Why does first layer curling happen in 3D printing? Main cause of curling is the temperature difference between the build plate and the extruded filament.