 by Mike Brooks |
Last Updated: March 6, 2022
by Mike Brooks |
Last Updated: March 6, 2022 As a 3D printer hobbyist, you must have at one time experienced failed or ugly first layers. Curling happens for several reasons, and it may sometimes be challenging to solve.
As an Amazon Associate, I earn from qualifying purchases. If you make a purchase after clicking on a link I may earn a small commission at no extra cost to you.
The first layer may curl because of uncalibrated machines or temperature-induced pressures.
Quick Navigation
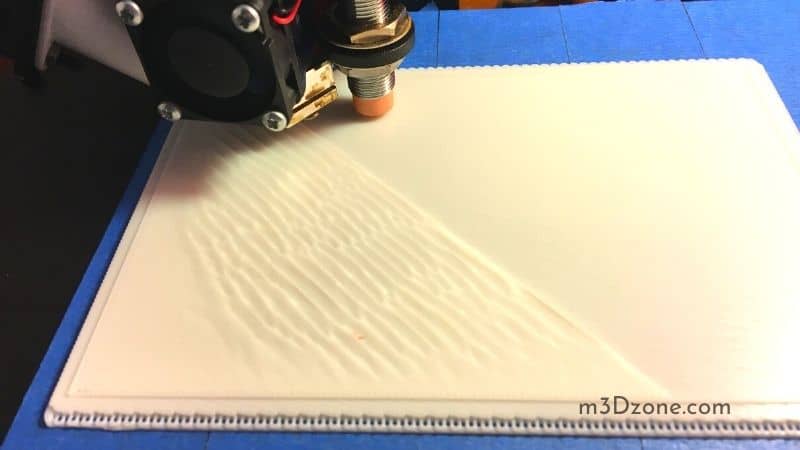
Curling or warping occurs due to melted filament shrinkage during a 3D printing process. Material shrinkage causes corners of the print to lift before it detaches from the build plate.
Equally, when you print plastic, it expands slightly but contracts as it cools down. So, if the material contracts excessively, it forces the print to bend up from the build plate.
Some materials tend to shrink more than others. For example, PC’s shrinkage remains higher than PLA. It means you need to be more cautious when using PC plastic to avoid curling issues.
This article will help you learn more about 3D print curling or warping and serve as a complete guide to avoid or minimize the problem.
Why Does First Layer Curling Happen?
When the first strings or thin layers of molten filaments come out of the printer nozzle, they contact the print surface. In the process, they get exposed to massive temperature changes.
Thin Layer
Materials tend to expand in hot environments. When you get solid filament into a printer nozzle, it heats up and expands. The hot filament can heat up to soaring temperatures of 250 degrees Celsius depending on filament type.
Now, the printer nozzle deposits the molten filament with a temperature of 250 degrees Celsius on a heated bed that is only 90 degrees Celsius.
This temperature variation induces massive filament contraction in the heated build plate surface and remains the first known cause of first layer curling.
This challenge may be the reason behind print failure from the start. However, it may significantly manifest in subsequent layers.
Notably, the first real cause of curling remains the temperature difference between the heated build plate and the extruded filament.
Room Temperature
The second cause of the first layer curling is the ambient air factor in the 3D printing environment. The print bed is not the only cold substance that molten filament contact.
Remember, room air has a lower temperature than the molten filament.
That is why industrial 3D printers have a heating chamber to eliminate these effects. Domestic printers also benefit from accompanying enclosures.
Still, open frame 3D printers lack enclosures and are directly exposed to ambient air causing first layer print curling.
How Do I Stop My First Layer From Curling?
If your printer bed remains unleveled, you’re likely to witness first layer curling. It would help if you inevitably leveled your print bed to get high-quality and successful prints.
Level Your Print Surface
A level print bed allows materials to extrude evenly across the entire surface. Also, a leveled print bed allows printing even first layers, resulting in high-quality finished products.
3D printers use a variety of mechanisms for build-plate leveling. Some use knobs located under the print surface, which can change the height of one build plate corner.
Additionally, you can use other knobs to adjust the entire build plate simultaneously.
Furthermore, some 3D printers have bed-level sensors. The sensors detect if the build plate has warped and automatically adjust it.
Besides, you can conduct a manual print bed leveling by bringing the printer nozzle to one corner of the bed. Then, you adjust the surface height to a point where a standard paper can’t pass through the gap.
When you adjust one-bed corner, move to the remaining ones and repeat the same process until you finish all the corners.
Adjust Z-Offset
Z-Offset is the distance between the Z-axis home position and the printer nozzle tip. Significantly, Z-Offset assures you to achieve an even first layer.
In theory, the Z-Offset is equated with the gap between the print surface and the hot end. Errors such as a faulty micro-switch, unleveled bed, and homing probes interfere with the standard parameters.
Therefore, you can achieve a good Z-Offset by simply leveling your bed appropriately. The key to an excellent first layer is to have a suitable Z-Offset and a correct bed level.
Regulate Nozzle and Heated Bed Temperatures
The difference in temperature between the hot filament and the build surface is the primary reason behind the first layer curling. Thus, you can avoid print curling by decreasing this temperature difference.
Besides, this informs you why a heated bed is necessary when 3D printing with some types of filament instead of a cold bed.
Ordinarily, the filament remains hotter than the bed temperature. So, when you increase the heated bed temperature and lower the nozzle temperature, you’ll manage to avoid first layer curling.
However, limits exist on printing temperatures, and any significant changes can create many fresh challenges.
For instance, hot filament enjoys more liquidity and adhesion. So lowering the temperature impacts adhesion, and may result in severe filament clogging.
The best way of going around this challenge is to fine-tune the temperature.
You can achieve temperature fine-tuning by test springing an object in various temperature ranges and choosing the temperature value that enables you to 3D print high-quality products.
Turn Off Cooling Fans
In 3D printing, you use cooling fans to improve surface quality to avoid stringing.
However, cold air flows over hot strings of filament, strengthening temperature difference and thermal pressures inside the plastic cause eventual first layer curling.
As such, the fans remain a source of unwanted airflows around the print bed. Advisably, you need to switch off your cooling fans to achieve the best first layers.
Regularly Clean Your 3D Printer Bed
You need to develop a habit of regularly cleaning up your 3D printer bed surface. Remember, each time you use it, filament leftovers accumulate on the print bed surface.
Don’t ignore cleaning dust and dirt. Even thin layers of dirt and dust can negatively impact filament adhesion resulting in first layer curling.
To clean the print bed surface, you can get several cleaners and alcohol in the market. For example, isopropyl alcohol (check at Amazon) is excellent for print-bed cleaning.
Monthly, you may remove your printer bed surface and wash it using soap and warm water. After cleaning, avoid touching it as you insert it back.
Use Adhesives
The 3D printing market has a variety of bed adhesives (check at Amazon), each promising great outcomes, that you can choose.
-
Blue Painter and Kapton
These adhesives are beginner-friendly options you may not want to miss. Use them by putting an even layer on your print surface.
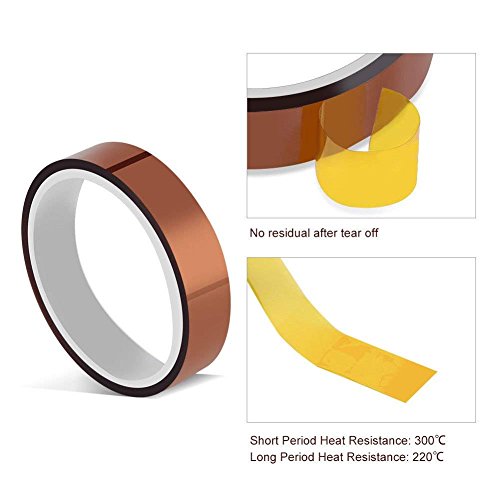
Also, you can set a thin layer of glue stick (check at Amazon) on the top to increase adhesion.
-
Hair Spray
Another option is to use hair spray (check at Amazon) directly on the bed surface. However, you’ll need to clean your print bed after every print.
Other adhesives available in the market that you can use include nano polymers and PVA glue sticks.
Improve on Basement
The print geometry can change adhesion and filament temperature profile. For example, if you add a brim, it will give the model a wider bottom area. Still, a wider bottom area ensures the model can better grip the surface.
Notably, a brim is one or more extra layers of the object’s outlines.
You may also opt to use a raft instead. Equally, the raft increases your model base creating a more oversized grip for your 3D model. Furthermore, a raft remains a separate entity from the printed item, and you can quickly chop off the print from it.
Another way of going around this challenge is adding thin discs in your design foundation called mouse ears. You may spread the mouse ears everywhere in the print bed, although you should commonly use them in sharp corners.
Avoid Drafts
Sometimes, you may do your best to ensure your print doesn’t curl, but it still curls. Check on open windows, and AC units if you’re in this position. They remain significant sources of ambient air that cause temperature differences resulting in curling.
Use an Enclosure
When you start 3D printing the first layer, the melted filament comes into contact with the hot end. Then, it spreads on the heated bed, and the first layer will keep its temperature around that of the heated bed until the process ends.
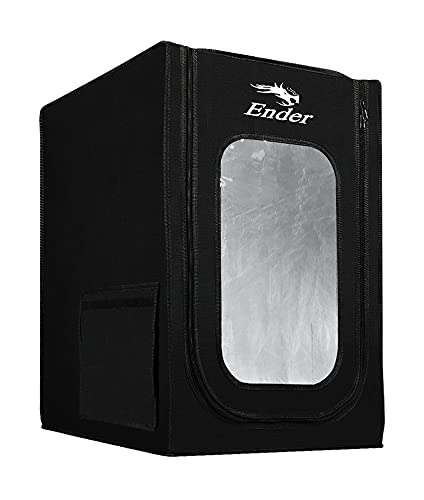
It would help if you used an enclosure to keep the object warm. Saving the generated heat in the chamber enables you to avoid air drafts.
How Do I Stop My Prints From Curling?
Curling in 3D printing occurs due to material shrinkage. This phenomenon causes the print head extruder temps and bed temp differences. It causes the print edges to curl and lift.
To stop your prints from curling, you can use the following techniques:
- Apply adhesion to build plate
- Level build plate correctly
- Use a brim
- Use a raft
- Adjust initial layer settings
- Use appropriate fan settings for cooling
- Use a front side door
- Print with a draft shield
How Do You Make a Perfect First Layer?
In 3D printing, the first layer remains the foundation for your entire 3D print. Therefore, getting the first layer right is all you need to achieve a perfect object.
However, even experienced 3D printer users attest that getting the first layer is not an easy undertaking.
5 Steps to Get The Perfect First Layer
- Level your print bed
- Slow down first layer speed
- Check temperatures
- Treat the build surface
- Add a raft, skirt, or brim
Conclusion
The first layer remains the basic foundation of a high-quality 3D print. Even experienced printers may at times struggle with getting the first layer correctly.
It would help if you got it right with tiny print details, such as the print speeds, extrusion width, bed temps, and a perfectly flat printer bed.
You now know several reasons that lead to curling or warping of the first layers and the steps you may follow to ensure you avoid this pitfall.
Also, the article provides you with numerous ways that you can follow to ensure you avoid general 3D print curling or warping.

Recommended Reading
Is PETG Food Safe? Things to Watch Out For!
Is PETG food Safe? PETG is considered food safe. However, this doesn't apply to all PETG filaments. Let's find out more!
HIPS Filament. Guide for 3D Printing with HIPS.
HIPS filament, a supreme 3D printing support material, provides many opportunities for professionals and 3D printing enthusiasts. Read more!
3D Printer Noise Levels. Make Your 3D Printer Quieter!
The average noise level of a 3D printer is 50 decibels, and it can range from 40 to 75 decibels. Let's see how you can adjust the 3D printer noise levels!