 by Mike Brooks |
Last Updated: May 3, 2022
by Mike Brooks |
Last Updated: May 3, 2022 Have you ever seen a really cool picture on Instagram, Facebook, or mobile phone and wished you could have a copy of it in its true form for yourself? Well, now there’s an easy way to do just that!
As an Amazon Associate, I earn from qualifying purchases. If you make a purchase after clicking on a link I may earn a small commission at no extra cost to you.
This article will show you how to make a 3D model from a picture in five easy steps for free.
Quick Navigation
So whether you’re looking for a unique piece of art for your home or office, or you want to be able to show off your amazing photography skills, read on for all the information you need.
How Do You Create a 3D Model?
There are a few different ways to create 3D models. One way is to use a computer-aided design (CAD) program. You can use CAD programs to make both 2D and 3D models.
Another way to create 3D models is through sculpting software. Artists often use this type of software to make 3D models of sculptures. Finally, you can use 3D printers to make 3D models from digital files.
CAD Software
Engineers and architects often use CAD programs while drawing detailed plans for projects. You can use CAD software to create both 2D and 3D models. These programs help users in creating precise models with complex shapes and a high level of detail.
Sculpting Software
Artists often use sculpting software to create 3D models of sculptures. This type of software gives users a lot of control over the shape and form of their models.
Sculpting software is also used in creating both realistic and abstract models.
3D Printers
You can use 3D printers to create 3D models from a digital file. This type of 3D printer builds up models layer by layer. 3D printers are often used to make prototypes and small-batch production runs.
Can You Convert a Digital Camera Picture Into a 3D Print?
The short answer is yes; you can transform a single photo from a camera into a 3D print. With the right equipment and know-how, it’s possible to take a 2D image and turn it into a physical, three-dimensional object.
Of course, the quality of your 3D print will depend on the quality of the picture you start with.
A low-resolution picture, for example, isn’t going to produce a very detailed 3D print. The best results will begin with a high-resolution camera photo or vector graphic from the SVG file.
Can You Convert One Picture Into a 3D Model?
Yes, it’s possible. With the right tools, you can convert 2D images into 3D models. However, the whole process is not always straightforward.
Additionally, the quality of your final product will depend on the original condition of the pictures.
If you’re interested in converting a 2D picture into a 3D model, there are a few different ways you can go about it.
In this article, we’ll explore some of the most popular technology methods for converting images into 3D models.
Can You Create a 3D Model From Multiple Photos?
Yes, it is possible to create a 3D model from photos. You can do that by taking advantage of our brains, that act as our free software for filling in missing information from photos.
By looking at several pictures of the same object from different angles, our brain can piece together a pretty accurate three-dimensional representation of that object.
There are a few different methods of technology to go about this. One is to find a series of images that show the object from different angles and use them to create an ‘image mosaic’.
That can be tricky, but there are software programs that can support this (Adobe Photoshop’s ‘ Photomerge’ tool is one example). You can also use free software online or use free google photos.
Another way to create 3D models from multiple images is to use special ‘depth map’ images. These images have been specifically designed to encode depth information and can be used to generate 3D models much like regular pictures.
How to Make a 3D Model From a Picture in 5 Easy Steps
The following five steps will help you learn how to create 3D models from any picture of your choice easily.
1. Choose the Right Image or Camera Settings
A good quality image will result in a highly detailed print and accurate 3D model. In contrast, a bad image can produce a subpar model lacking detail or otherwise inaccurate with errors.
So, how do you choose the right photo or capture one for 3D printing?
Here are a few tips to help you search for the right photos:
- Avoid low-resolution photographs. A low-resolution picture will result in lower-quality 3D models. If possible, use an image that is at least 1000×1000 pixels.
- Make sure the image is well-lit. A well-lit picture will produce better 3D models than a poorly lit picture.
- Use a photo with good contrast. Good contrast between the foreground and background will result in a better 3D model from photos.
- Avoid using images with too much noise. Noise can negatively impact the quality of your 3D model from photos.
- Choose a photo that is in focus. A clear and well-focused picture will produce a better 3D model than a poorly focused or blurry image. Ensure your camera settings are properly set to capture a quality image for your print.
2. Edit the Image
The first step is to open the pictures in a photo editor, such as Photoshop or other free software. Next, remove any unwanted objects from the photo in your scene using the clone stamp tool. Then, use the eraser tool to remove any remaining background noise or unwanted features.
Once you have removed all unwanted objects from the scene and background noise, you can begin to modify the main subject of the image. Use the selection tools to isolate the subject, and then use the airbrush tool to smooth out any rough edges or unsuitable material.
3. Convert the Image Into a 3D Model
Some design professionals, such as engineers and architects, need to create three-dimensional (3D) models from two-dimensional (2D) images for their work.
There are different ways to transform an image into a 3D model using slicing software, each with advantages and disadvantages.
Using 3D Scanners
One way to convert pictures into a 3D model is to use a computer program that can generate 3D from photos. These programs sometimes called “3D scanners”, work by analyzing the pixels in an image and then creating 3D models based on the data.
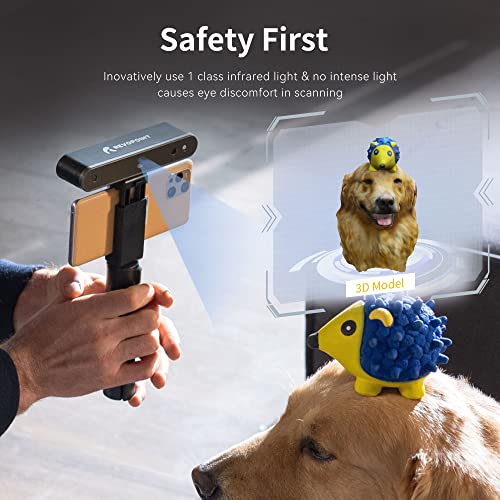
The advantage of 3D scanning equipment is that it can create very accurate 3D models. The disadvantage is that 3D scanners can be expensive, and they require a lot of computing power to run the data.
Using Photogrammetry
Another way to transform an image into a 3D model is to use photogrammetry. Photogrammetry software works by taking multiple photos of an object from a different angle and then using special software to stitch the photos together into a 3D model frame.
The advantage of photogrammetry is that it does not require expensive equipment. The disadvantage is that it can be time-consuming to shoot enough photographs to create high-quality 3D models.
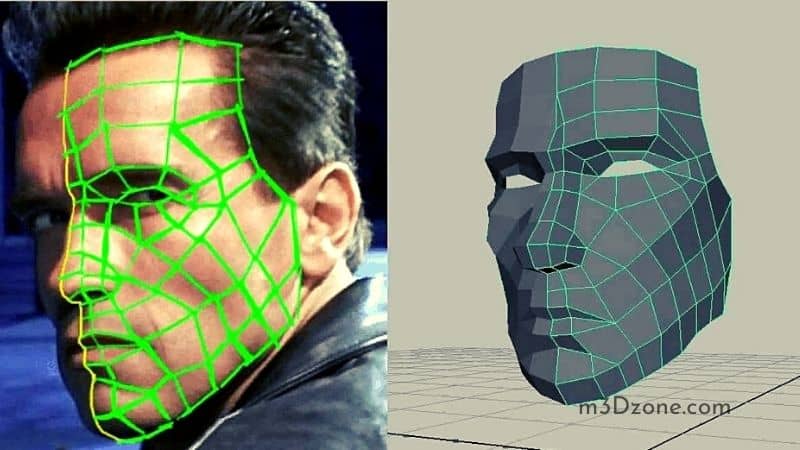
Using 3D Reconstruction
A third way to transform an image into a 3D model is to use “3D reconstruction.” 3D reconstruction works by taking an image of an object and then using algorithms to create 3D models from the image.
The advantage of 3D reconstruction is that you can use it to mold 3D models from images that have been taken with regular cameras. The disadvantage is that the models created by this technique are not as accurate as those created by other methods.
4. Export the Model
There are a few ways to export a 3D model to be used in other software or for the 3D printing process. One way is to use a 3D modeling program like Blender, which has an upload function for various file formats.
Another way is to use a dedicated 3D printing program like TinkerCAD, which can export files for 3D printing. Finally, some 3D scanners have software to upload models in various formats.
If you’re unsure which file format to use, the STL format is a good choice since it’s compatible with many different programs and 3D printers.
Once you’ve exported your model as an STL file, you can then use a program like MakerBot Desktop to slice the model and prepare it for 3D printing.
5. Import the 3D Model Into Your Software
There are several ways to import 3D models into your software. The most common and easy method is to use a file format that is supported by your software.
Popular formats include OBJ, FBX, and Collada. Another way to open models is to use a plugin or an external application to export the model into a format that your software can understand.
Once you have the model in a format that your software can read, you need to open it into your project. That is usually done through the file menu by selecting open.
Once you download the model, you should be able to see it in the 3D view. If not, check other file settings and make sure that you download the model as a 3D object.
Now that the model is imported, you can start using it in your project. You can move it, rotate it, and scale it just like other objects in your scene.
You can also add materials and textures to your download and apply lighting effects.
Conclusion
In conclusion, using the five simple steps we’ve outlined above, you can easily create 3D models of almost anything. The software is user-friendly and makes the process relatively easy.
With a few practice runs, you will be able to quickly turn any two-dimensional pictures into three-dimensional objects that you can hold in your hands.

Recommended Reading
Are 3D Printer Nozzles Interchangeable?
Are 3D printer nozzles interchangeable? Nowadays, 3D printers support interchangeable nozzles. But, 3D printing nozzles aren't universal.
3D Printing Molds for Casting [Step by Step Tutorial]
3D printing molds for casting is rising in popularity in the 3D printing industry. It helps you to acquire various 3D printed products. Let's see how it's done!
3D Printing Fume Extraction. Solutions & Safety Tips!
Let's dive into some 3D printing fume extraction methods. It will ensure 3D print safety devoid of contaminants from heated filaments from fumes.