 by Mike Brooks |
Last Updated: June 25, 2022
by Mike Brooks |
Last Updated: June 25, 2022 As 3D printing technology continues to evolve, there’s one area that has remained relatively unchanged: the G-codes. G-code is a program code that instructs a 3D printer on what to do.
It’s like the printer’s native language. The most basic G-codes are for moves and turns, while the more complex ones can control the speed and temperature of the printer.
This article looks at what G-code is, how it’s used, and some of the most common commands.
Quick Navigation
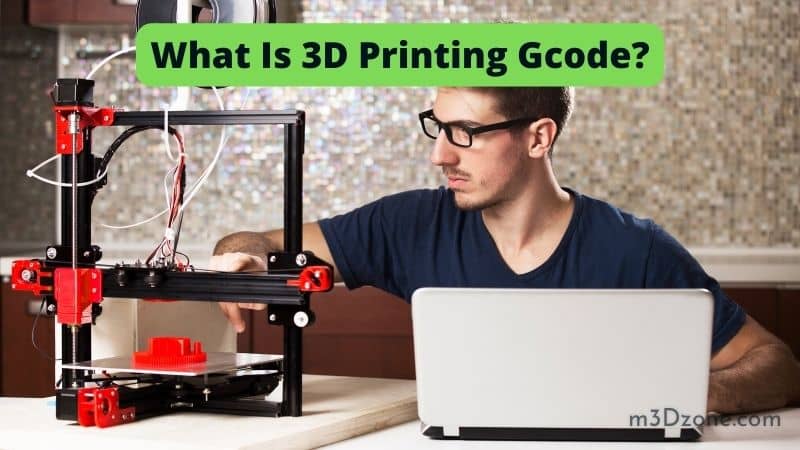
What Is 3D Printing Gcode?
The G-code is a programming language for instructing the functioning of 3D printers. The language tells the machine what movements to make, how fast to move, and what path to follow.
It is a very versatile language and can be used to create simple or complex shapes as well as control the accuracy of the printer.
Basic Guide to 3D Printing G-code
Below is a basic guide to help you understand the printing of G-code.
How Do You Create a G-code File for a 3D Printer?
G-code is the common name for the most widely used computer numerical control (CNC) coding language. It is applied in various applications, including 3D printing.
The Gcode file tells the 3D printer what movements to make in order to create the desired 3D object. Stepper motors typically control these movements.
There are many software programs that can be used in writing g code files. Some of these programs are designed specifically for 3D printing, while others are more general-purpose CNC programming tools for CNC machines.
The file will be created using a CAD (computer-aided design) program in most cases, by which a 3D model of the object to be printed is created by the designer. This model is then exported as a g-code file.
Once the Gcode file has been created, you can send it to the 3D printer for printing. The printer will read the g-code and use it to control the stepper motors that move the print head.
You can create your own g code files manually without using a CAD program. However, this is generally only done by experienced users who are very familiar with the 3D printer and the g-code language.
How To Read G-code Files
As a 3D printer user, you may find yourself needing to open and read G-code files from time to time. To open a G-code file, just use any text editor, such as Notepad++ or Microsoft Word. Once you have the file open, you can view the printing instructions contained within.
For easier understanding, the code files are typically formatted in a way that uses whitespace to delineate different G-code commands. In that case, each line of code represents a different printing instruction.
As you can imagine, reading G-code files can be quite tedious if you don’t know what you’re looking for.
To simplify the reading, you can use a G-code viewer, which is more recommended. A G-code viewer is a program that allows you to visualize the printing instructions in a more user-friendly way.
That simplifies the manner in which you understand what the printer will do and how it will do it.
Many different code viewers are available, but the most recommended is Cura or Slic3r, which are free to download and use. Once you have a G-code viewer installed, open the file that you want to view.
The printing instructions will be displayed in an easy-to-understand format. From there, you can make any necessary adjustments to the code before printing.
Compatibility
3D printers use a variety of file formats, and not all files are compatible with every printer. The most common file format is .stl, but there are others, such as .obj, .3mf, and .G-code.
Each printer has its specific requirements, so it’s important to check compatibility before attempting to print a file.
- .stl files are the file format that is commonly used. They can be created from 3D CAD programs or scanned from an existing 3D object. STL files are generally compatible with all printers, but there may be some differences in quality between printers.
- .obj files are another common file format. They are generally less compatible with 3D printers than .stl files, but some printers may be able to print them.
- .3mf files are a newer file format that is increasingly becoming common. They are designed to be more compatible with 3D printers than .obj files.
- .G-code files are specific files that contain instructions for printing an object. They are not compatible with most printers, but they may be the only file format that is compatible with some printers.
G-code Commands List (G-code Cheat Sheet)
The following are various miscellaneous commands that can help you when coding or troubleshooting your 3D printer.
G0 and G1: Move
3D printers use different commands to move the print head, and G0 and G1 are two of the most common. G0 moves the print head quickly, while G1 moves it more slowly. The printers usually have a default speed for each command, but you can also set custom speeds.
You’ll often need to move the print head around to different parts of the build plate when you’re printing. The G0 and G1 commands are both used for this purpose.
G0 moves the print head quickly and is typically used for travel moves, i.e., the print head movement from point to point without printing. That is the fastest way to move the print head and can help reduce print times.
G1 moves the print head more slowly and is typically used for actual printing. That allows the printer to lay down material more accurately and produce better-looking prints.
You can also set custom speeds for both G0 and G1 moves. 3D printers typically have a default speed for each command, but if you want to fine-tune your print quality or reduce print times, you can set custom speeds.
To set a custom speed, use the M203 command. For example, to set a custom speed of 50 mm/s for G0 moves, you would use the following command:
M203 G0 F50
That would set the feed rate (F) for G0 moves to 50 mm/s. You can also set custom speeds for G1 moves in the same way.
When you’re sending commands to a printer, it’s important to make sure the commands are formatted correctly.
Incorrectly formatted commands can cause the printer to move unexpectedly or even stop working altogether.
If you’re not sure how to format 3D printer commands, check the documentation for your printer or contact the manufacturer.
G90 and G91: Absolute and Relative Positioning
On a 3D printer, there are two main ways to specify the position of the nozzle: absolute positioning and relative positioning.
With absolute positioning (G90), the coordinates specified for each movement command are interpreted as being absolute distances from the point of origin.
In other words, if you move the nozzle 10mm to the right from the point of origin, it will always move 10mm to the right from that point, regardless of its previous position.
With relative positioning (G91), the coordinates specified for each movement command are interpreted as being relative distances from the current position of the nozzle.
So if you move the nozzle 10mm to the right from its current position, it will move 10mm to the right from that position.
On the other hand, if you then move the nozzle 10mm to the left, it will only move 5mm to the left (since it started from a position that was already 10mm to the right).
Your printing objective is what determines the mode you use. For example, if you want the printer to always start printing from the same exact spot, absolute positioning mode is the way to go.
If you’re trying to print something larger than your printer’s build area, relative positioning mode can be helpful. That is because it allows you to move the nozzle outside of the build area without having to worry about the absolute coordinates.
Some printers have a default setting of absolute positioning, while others have a default setting of relative positioning.
If you’re not sure which mode your printer is in, you can check the manual or the software settings to determine the exact position.
G28 & G29: Auto Home and Bed Leveling
3D printers usually have an auto homing feature that allows them to home themselves to a specific point on the build platform. That is usually done by pressing a button on the printer’s control panel.
The printers also have a bed leveling feature to level their build platform automatically. That is usually done by running a G29 command from the machine control panel.
The printer homes itself by moving the print head to the front left corner of the build plate. That is done by running the motors in both directions until the end stops are triggered.
Homing can be performed manually using the controls on the printer or automatically using G-code commands.
To home manually, use the controls on the printer to move the print head to the front left corner of the build plate. Once the head is in position, trigger the end stops for each axis. That will home the printer and prepare it for printing.
To home automatically, use G-code commands. The printer will run through a homing procedure before starting a print job. That is the recommended method, as it is more accurate and reliable than manual homing.
To use the G29 command, you will first need to calibrate your 3D printer. That can be done by following the instructions in your printer’s manual.
Once you have calibrated your printer, you can then level the bed using the G29 command.
The G29 command will take a few minutes to complete, and during this time, your printer will be inactive. Once the G29 command has finished, your printer will be ready to use again.
M104 and M109: Heat Extruder
3D printers use m commands, the M104 and M109, to heat the extruder. These g-codes set the desired temperature of the hot end and wait for it to reach that temperature.
The 3D printer extruder is a device that heats and melts plastic filament for depositing in layers to create 3D objects. The M104 command in printing controls the extruder heater. It turns the heater on or off and sets the temperature.
M104 Sxxx T0/1 (Turns the extruder heater on or off. If S is given, sets the temperature. Requires T to be 0 or 1)
M104 Snnn T0 (Set the extruder heater temperature to nnn)
M104 Snnn T1 (Set the bed temperature to nnn)
The M109: Heat Extruder is an easy way to get started with printing, and it’s a good option if you want to upgrade your 3D print.
It comes with a 3D printed filament guide, a 3D printed hot end mount, and a 3D printed filament holder.
The M109: Heat Extruder is compatible with most 3D printers that use a standard 1.75mm filament, and you can use it with any 3D printer that has a heated build platform.
It is available in two different versions: the Standard and the High-Flow versions.
The Standard version is recommended for most 3D printers, and the High-Flow version is recommended for 3D printers that have a higher flow rate.
M106 and M107: Fan Control
As 3D printers have become more popular, the need for better control over the cooling fans has grown. 3D printer controllers typically have two fan connectors, and each supports PWM speed control.
The M106 command controls the fan connected to the first connector, while the M107 command controls the fan connected to the second connector.
The M106 and M107 commands take a single parameter, which is the PWM duty cycle from 0 to 255.
A value of 0 turns the fan off, while a value of 255 keeps the fan running at full speed. For example, the following command would turn the first fan on to half or slower speed:
M106 S127
And the following command would turn the second fan off:
M107 S0
M140 and M190: Heat Print Bed
One key element of printing 3D is the build platform, or print bed, which supports the object being printed and can be heated to help with adhesion during the printing process.
There are two common types of 3D printer build platforms: M140 and M190. M140 platforms are typically used for smaller objects, while M190 platforms are better suited for larger prints.
M140 platforms use a lower temperature than M190 platforms, making them ideal for printing with PLA filament. The source of PLA plastic is biodegradable raw materials such as sugar cane or corn starch.
PLA is a popular printing material because it is easy to print with and has a low environmental impact.
M190 platforms can reach higher temperatures, making them better suited for materials like ABS that require higher temperatures to fuse properly.
ABS plastic is a product of petroleum; hence it is a strong, durable material that is often used in printing 3D objects.
As you choose a 3D printer, it is necessary to consider the types of materials that you will be printing with. For example, if you plan on using PLA filament, then an M140 platform will be sufficient.
In addition, if you plan on using ABS or other materials that require higher temperatures, then an M190 platform will be sufficient.
FAQs
1. Do All 3D Printers Use G-code?
No, not all 3D printers use G-code. G-code is a specific type of programming language used by some 3D printers. Other 3D printers may use a different type of language or none at all.
2. What Is G-code in 3D Printing?
G-code is the programming language that tells 3D printers what to do. It is a series of instructions that tell the 3D printer how to move, how fast to move, what bed temperature to use, etc.
3. Do 3D Printers Use STL or G-code?
3D printers use various file formats, but the most common are STL and G-code. STL design file is the standard one for printing 3D and can be created with any 3D modeling software.
G-code is a more specific format that is often used for complex prints or when using multiple materials.
4. Is G-code Only for 3D Printers?
G-code is a versatile language that you can use for 3D printing and also for other purposes such as CNC machining and 3D scanning. While it was developed specifically for printing 3D, its applications have since expanded to include other technologies.
Conclusion
3D printing G-code is a set of instructions that tells a 3D printer how to create an object. It can be created using 3D modeling software or via a 3D scanner.
The G-code file contains the instructions for the printer, including the size and shape of the object and the specific path that the 3D printer should follow. The printing G-code can be customized to create unique objects.

Recommended Reading
Best Room Temperature for 3D Printing Environment
What is the best room temperature for 3D printing? It's advisable to maintain a room temperature range of between 68°F to 77°F (20°C to 25°C).
How Small Can a 3D Printer Print?
How small can a 3D printer print depends on the printer’s additive manufacturing. There are three common types of 3D printers: FDM, SLA, and DLP 3D printers.
How to Make a 3D Model From a Picture in 5 Easy Steps
How to make a 3D model from a picture in 5 easy steps! With a few practice runs, you will be able to quickly turn any 2D pictures into 3D objects. Let's see!