 by Mike Brooks |
Last Updated: September 24, 2025
by Mike Brooks |
Last Updated: September 24, 2025 When working with 3D printers, one of the most common issues that you may run into is filament sticking to your nozzle. It’s important to prevent this from happening for several reasons.
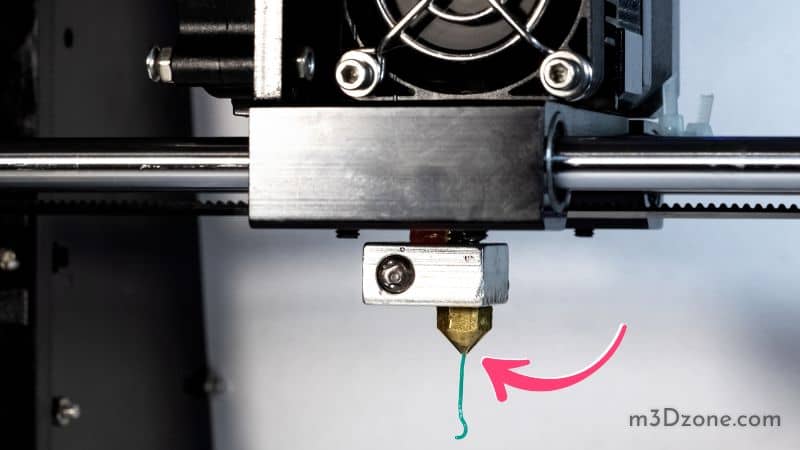
First and foremost, if the filament is stuck in your nozzle, it can cause damage to both your printer and the filament itself.
When this happens regularly, it might lead to poor print quality and wasted material.
Quick Navigation
- How to Fix Your 3D Filament Sticking to Nozzle
- 11 Steps to Prevent the 3D Filament from Sticking to Nozzle
- Step 1: Cleaning the Nozzle
- Step 2: Printing at Lower Temperatures
- Step 3: Remove the Old Filament
- Step 4: Use a Quality Filament
- Step 5: Make Sure the Filament Is Not Too Cold or Too Hot
- Step 6: Adjust Nozzle Height
- Step 7: Fix Inconsistent Filament Diameter
- Step 8: Get Nozzle Close to the Bed
- Step 9: Try Not to Use Cooling for the First Layer
- Step 10: Use the Right Temperature
- Step 11: Use an All-Metal Hot End
- Other Solutions
- FAQ’s
- Conclusion
How to Fix Your 3D Filament Sticking to Nozzle
Because it ensures uniform extrusion, increasing your nozzle temperatures to fix 3D printing filaments getting stuck to the nozzle is a simple solution.
Your nozzle or extrusion route may be clogged in some cases; clear it as best you can. Increase the warmth of your bed and make sure your nozzle isn’t too far away from it.
11 Steps to Prevent the 3D Filament from Sticking to Nozzle
Here are some ways to prevent 3D printer filament from sticking to nozzles:
Step 1: Cleaning the Nozzle
If you have a brand new 3D printer, your first prints will likely be very good and have excellent print quality. But as time passes by, this may not be the case anymore.
You might start noticing some problems with your prints, like poor surface finish or bed adhesion between layers, or filament sticking to the nozzle!
The main reason for this is dirt or dust accumulation on the nozzle surface, which causes the plastic to stick to it rather than extrude.
To fix this problem, you need to clean off any residue from inside the clogged nozzle using a wire brush or sandpaper so that it can slide effortlessly through without any friction.
Ensure that you don’t use too much force while cleaning because if you damage any part of your hot end, it could cause further problems in the future!
Step 2: Printing at Lower Temperatures
Many filaments come shipped with recommendations on how hot they should be printed based on their material type.
Still, the print bed temperature varies widely depending on other factors such as humidity and ambient temperature in your home or office space.
So if your prints are getting clogged often or coming out with poor layer adhesion, try printing at lower temperatures until they get better!
Step 3: Remove the Old Filament
Before inserting a new filament into your printer, remove any old filament from the inside of your printer. You may have to do this by hand or with pliers depending on what type of printer you have.
Be careful when removing old filament because it will still be hot and melt easily if touched by bare hands or pliers that aren’t insulated with heat-resistant gloves or covered by a cloth strap, so they don’t get burned.
After getting rid of the old filament, wipe down any remaining residue.
Also, dust on the spool with a damp cloth so it doesn’t get inside your printer and cause further problems later on during printing operations when it comes time for extrusion operations again later on after we’re done.
Step 4: Use a Quality Filament
Using quality filament is important for preventing the filament from sticking to your nozzle. It’s not just about the price but also how well the filament sticks together and what it’s made from.
You should look for a filament with very low tackiness or stickiness since this will reduce friction between the two surfaces.
It’s done by purchasing a high-quality brand of 3D printer filament like Hatchbox, which uses high-quality materials for their filaments and tests them thoroughly before shipping them out to customers.
Also, use filaments that are designed for your specific brand of printer. This way, you know that they will work with your machine without any problems or adjustments required from you.
Step 5: Make Sure the Filament Is Not Too Cold or Too Hot
The first step in preventing filament from sticking to the nozzle is making sure that your filament is at an ideal temperature.
The ideal temperature depends on the type of plastic you are printing with. For best results, most plastic filaments should be printed at around 200 degrees Celsius (392 degrees Fahrenheit) or above.
If your filament is too cold, it will cause problems when extruding and may even snap inside your extruder because it’s too brittle from being cold.
Using a hot filament will make it more likely for bubbles to form inside the extruder, which will also cause issues when printing.
It’s important to know what kind of plastic you’re using and what temperature range works best so that you don’t end up wasting any material or damaging anything inside your printer!
Step 6: Adjust Nozzle Height
First, adjust your printer’s nozzle height. If it’s too high, your filament will tend to curl around it, which makes it easier for it to stick where it shouldn’t be sticking.
A good rule of thumb is that your nozzle is too high if you can’t see the light through the extruded filament when it’s coming out of the nozzle.
Adjusting the height will take some trial-and-error, so be patient with yourself as you go along!
Step 7: Fix Inconsistent Filament Diameter
The easiest method to prevent the filament from sticking to your nozzle is to ensure that it has a consistent diameter throughout the length.
If it’s too narrow, it can cause problems because there isn’t enough space between it and the walls of your extruder.
If you have any inconsistencies in its diameter, you should use a pair of calipers or micrometers to measure its size at various points along its length.
Also, ensure to check whether there are any kinks or knots in the filament, which can cause problems during printing.
Step 8: Get Nozzle Close to the Bed
The first step to preventing your 3D printer from getting clogged is to ensure that your nozzle is touching the bed while printing. If you don’t have auto-leveling built into your machine, this may not be possible.
However, if your printer has auto-leveling, make sure that it is enabled and working properly so that when you start a print job, the head gets automatically lowered down onto the bed until it touches it.
Step 9: Try Not to Use Cooling for the First Layer
It is best not to use cooling when printing with PLA as it can cause your printed object to have a rough surface finish or even cracks.
If you are experiencing this issue, try printing with no cooling for your first layer and then increase the temperature by 10 °C for each subsequent layer.
You may also consider using a higher temperature for your first layer (around 240°C).
Step 10: Use the Right Temperature
One thing that makes it hard to get started on a new project is no idea what temperature setting works best for the material used.
In general, printing at lower temperatures will result in better results than higher ones, but only if the extruder has enough power to push through them.
If not, this could lead to poor adhesion between the first few layers or even clogging issues down the line.
Step 11: Use an All-Metal Hot End
Metal parts tend to be more heat-conductive than plastic ones making them better at keeping temperatures consistent throughout your prints without needing much work on your part!
Other Solutions
Listed below are other alternative solutions for unclogging the nozzles:
- Use a heated or non-heated bed. A heated bed will keep the filament from sticking for a longer period. If you do not have a heated bed, you should use a hairdryer to blow on the nozzle after unloading your filament.
- Print at low speeds. If you print too fast, there is a greater chance that the filament will stick to your nozzle.
- Use more torque settings if available. It will help reduce any filament jamming in your extruder head and thus prevent it from getting stuck when printing at low speeds.
- Cleaning pens and brushes are easy to use, and they come in different sizes, shapes, and colors. So you should always have one handy when working with 3D printers.
- Use compressed air cans or blow dryers on low speed to remove any dust or dirt that may be stuck on the nozzle or around it.
- After cleaning your printer manually or using compressed air cans, make sure that all parts are dry before putting them back together again, so they do not get damaged while operating again.
FAQ’s
Why Is Filament Not Coming Out of Nozzle?
A typical cause of this problem is too much moisture in the air around your 3D printer. This moisture collects on your filament spool and other components in your build area, including the extrusion head.
When you are experiencing problems with your filament not coming out of your nozzle, there are various possible explanations for why this might be happening.
The first thing you should do when trying to diagnose this issue is turn off and unplug your printer for about 30 minutes before attempting to use it again.
This will give the hot end time to cool down and prevent any potential damage when first powering on after an extended break.
Another thing to do while waiting for the printer to cool down you can also check that all of the nozzles are clean by inspecting them visually and using compressed air if necessary.
If there are still issues after waiting 30 minutes, try cleaning out.
Another way to prevent this from happening is to keep your build area well-ventilated and make sure there’s plenty of airflow around your printer. You can also try using a dehumidifier if you have one available.
Why Does Filament Keep Getting Stuck?
The filament gets stuck if:
- You’re using a filament that’s too soft or too stiff
- You’re trying to print with the nozzle too close to the bed
You’ll get the filament stuck, but you can fix this by changing your settings and making sure your printer is calibrated correctly.
How Do You Keep Filaments from Sticking to Bed?
You can use blue painter’s or foil tape to keep the bottom layer from sticking to the heated print bed surface without affecting printing quality too much.
If you want to use a glue stick or hairspray to keep your model from lifting off the bed during printing, make sure that it does not contain any solvent which may damage your 3D printer parts over time.
Why Is My Filament Curling Around the Nozzle?
This happens when the nozzle gets too hot and melts the plastic before it can cool down. To fix it, make sure that your printer is calibrated correctly and that you aren’t printing at too high a temperature.
Conclusion
Keeping the nozzle clean and free from any filament stuck on it is important. The nozzle is an important part of the printer.
The nozzle heats up and cools down with each print, so the more you use it, the more chances it will get dirty.
A dirty nozzle can cause problems in printing quality, especially when you are printing small parts or details. You can also use a hair spray to unclog the nozzle tip.

Recommended Reading
Optimal ABS Filament Temperature for Your 3D Prints
What is the optimal ABS filament temperature? ABS has a relatively low melting point so that it can be printed at lower temperatures than other materials.
How to Prevent PLA Warping. Useful Tips & FAQ’s.
Is PLA warping weighing down your 3D prints and destroying all the effort you put into? This post will help you identify the causes and how to overcome them.
How to Level Your 3D Printer Bed. [Easy Step-by-Step Guide]
When dealing with a 3D printer, it's essential to understand its anatomy. Learn how to level 3D printer bed correctly or a successful 3D printout.